Automations
Over the following sections you will find information about how to create and manage Automations.

Anatomy of an Automation
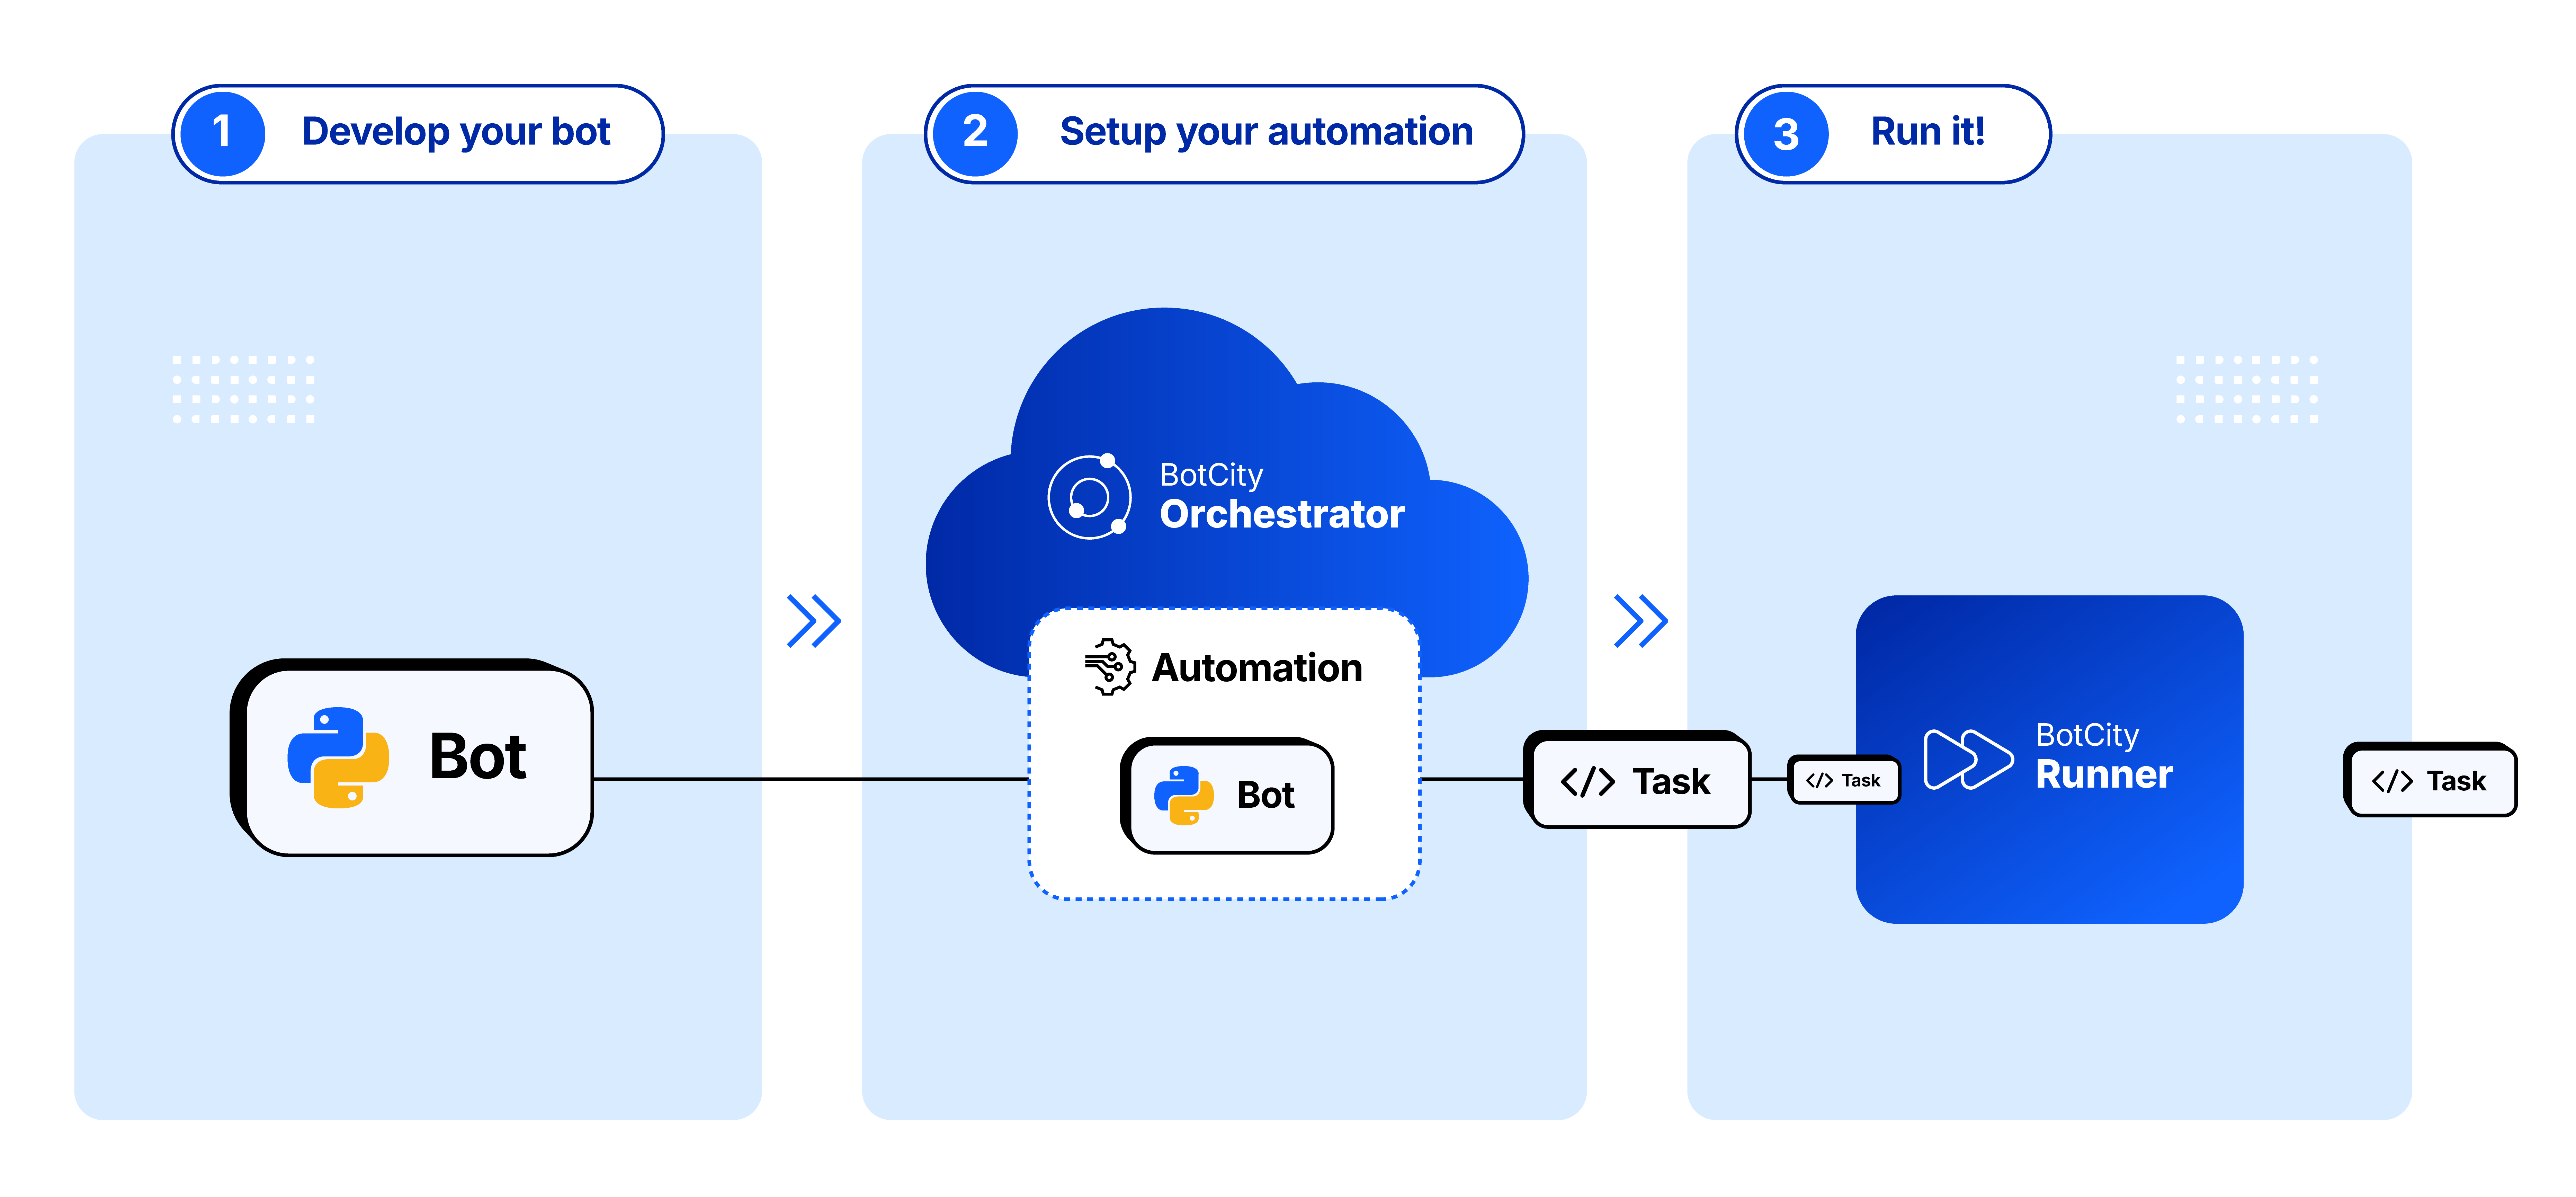
An Automation is one of the most important elements of the BotCity Orchestrator, it characterizes a process to be executed.
The Automation is responsible for linking the Bot (script, software, or process code) with the Runners (instances of the BotCity Runner service). Therefore, when creating a new task, the Automation module will contain information about which Bot to use and which Runner the task should be directed to.
An Automation can contain more information and settings about a process to be executed. We can view the information in the Overview and Development tabs
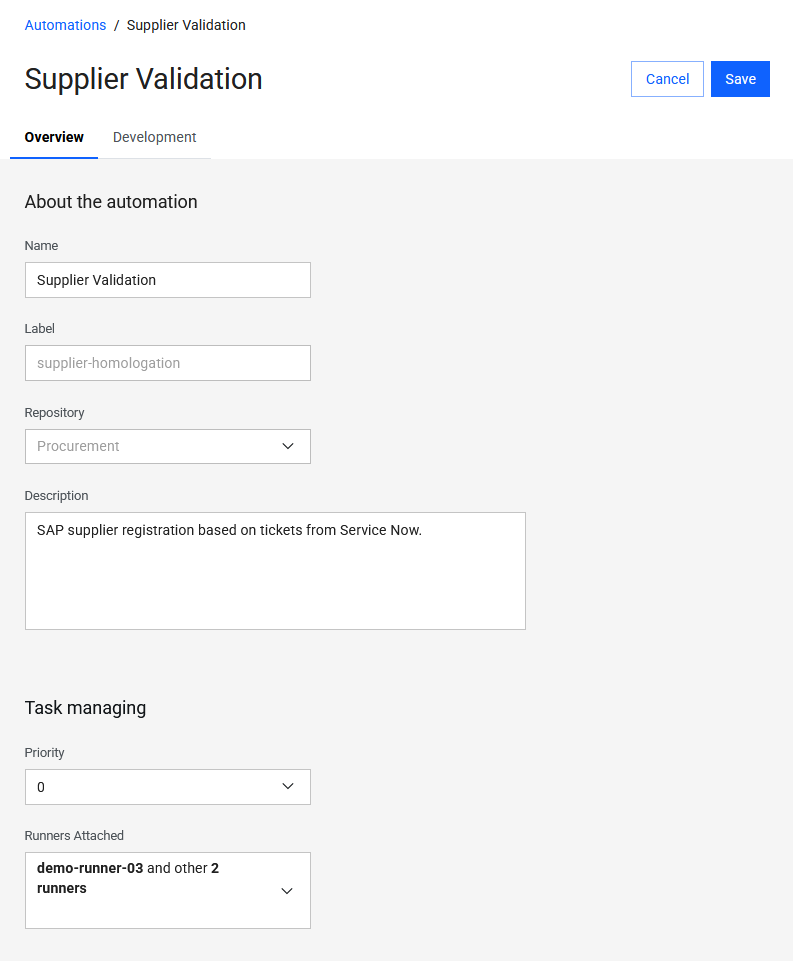
Overview
In this tab, we have general information about the Automation, separated into blocks:
-
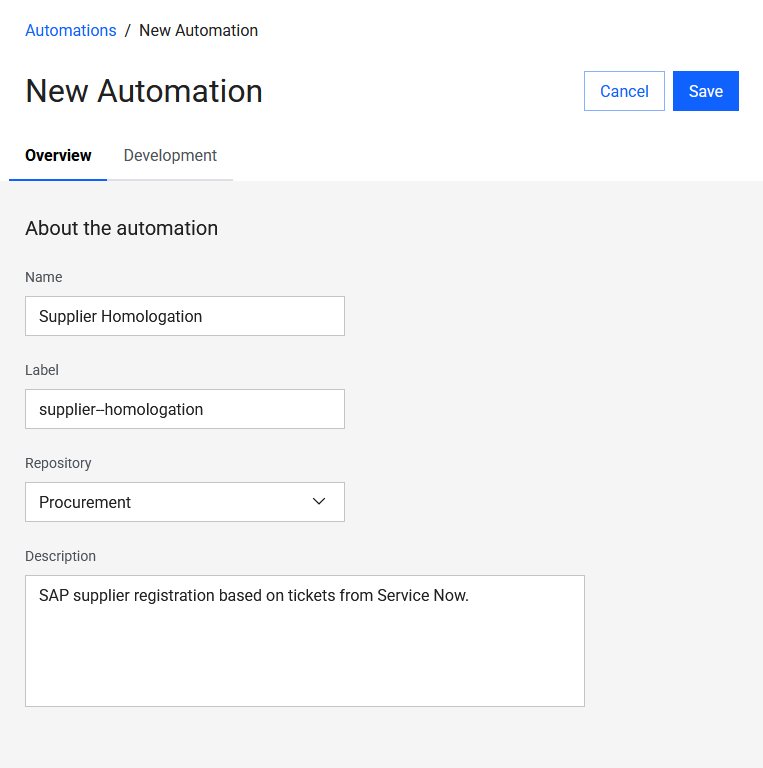
About the automation
- Name: The friendly name of the automation.
- Label: The unique identifier of the automation (the
labelis unique, even if you delete the automation you cannot use it again). - Repository: Name of the repository where the automation is allocated.
- Description: A brief description about the automation process.
-
Task managing
- Priority: The default execution priority of this process.
- Runners Attached: List of Runners associated with this automation. If more than one Runner is attached, the task will be distributed to the first free BotCity Runner that is online and available.
-
Notifications
- Users to notify: The list of users to be notified when alert notifications of a given type happen.
- Notification type: The types of alert notification for which to notify users.
Important
The users selected in the Notify Users field will receive an email notification every time the automation triggers an alert via code.
See more details about the Alerts functionality of the Orchestrator.
Development
In this tab, we find development information about the Automation, separated into blocks:
-
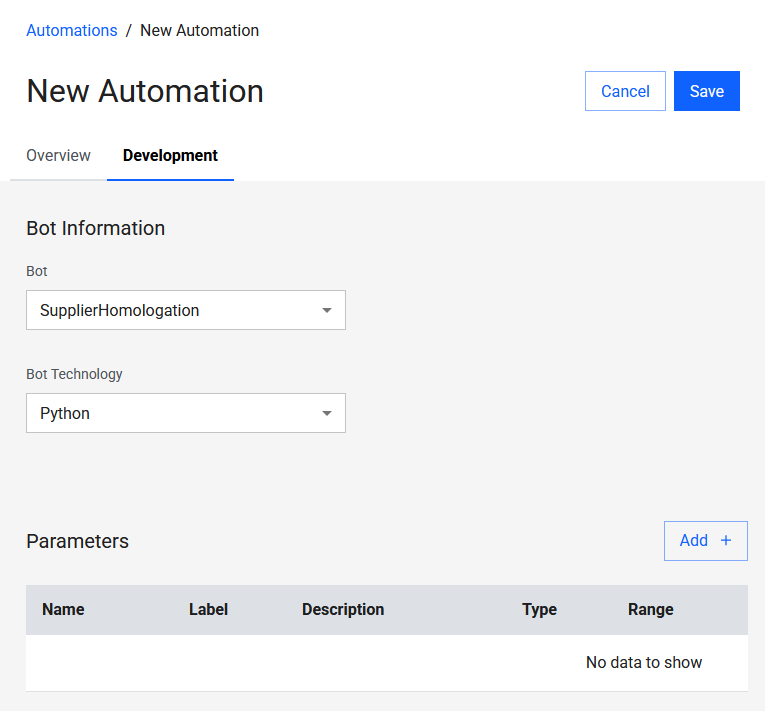
Bot Information
- Technology: Technology or programming language used in the automation.
- Bot: The code of a process or software associated with this automation.
-
Parameters: Dynamic information that can be used by the
Bot.
Parameters
Automations can be parameterized for greater flexibility and more dynamic code.
Parameters are defined in the Parameters section of the Automation when creating or editing it.
In Development, click the Edit button to enable the editing fields, then click the Add + button to add a new line in the parameters.
A parameter is defined by the following elements:
- Name: The friendly name of the parameter.
- Label: The unique identifier of the parameter.
- Description: A brief description about the parameter.
- Type: Selection of the parameter data type, which can be:
Text: Text input type.Integer: Integer number input type.Double: Decimal number input type.Date: Date input type.
- Range: Indicates the minimum and maximum value for numeric data input.
- Default Value: Indicates which input value is set as default for the field.
- Required:
Yes: It is mandatory to provide a value for the field when creating a task.No: It is optional to provide a value for the field when creating a task.
- Actions:
Delete: Deletes the parameter.Edit: Opens parameter editing.Cancel: Cancels parameter editing.Save: Saves parameter editing.
Tip
The Type will determine how the parameter is displayed when creating a new task in the BotCity Orchestrator.
See more details on how to create and access Parameters.
Create an Automation
Create a new Automation by clicking the + New Automation button in the top-right corner.
Fill in the required fields on the form and click Save at the top of the screen.
Warning
Required fields are: Name, Label, Repository and Description.
Other information can be filled in later; however, to run tasks for this automation you must have a Bot and at least one Runner attached.
Here are examples of creating an automation:
- Overview
- Development
Tip
Automations can also be created using the Easy Deploy feature.
Warnings!
You may see a warnings panel when the Automation is not fully completed.
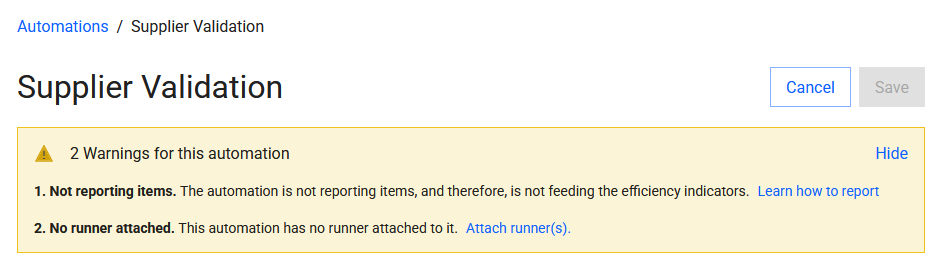
Warnings may indicate missing important information, such as Bots or Runners not attached.
They can also indicate no item reporting, which means your Automation code is not yet reporting data to the platform.
Enabling item reporting in your automation allows you to track items processed successfully or with failures for each executed task.
See more details in the BotCity Maestro SDK documentation.
Important
This feature is part of BotCity Insights, a module dedicated to reporting and displaying data related to your automation initiative.
See more about this module in the BotCity Insights documentation.
Edit an Automation
After creation, you can edit some Automation information.
To edit, click the Automation name, click the Edit button, change the necessary fields and click Save.
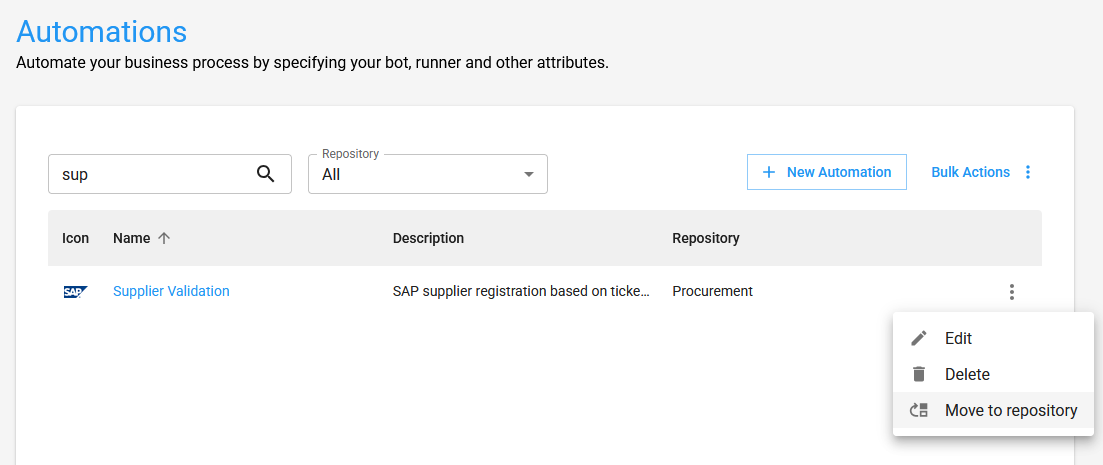
Move to Repository
Automations can be moved to another repository.
To do so, select the desired Automation, open the actions menu and choose Move to repository, as shown:
A dialog will open to select the target repository; after selecting it, click Confirm.
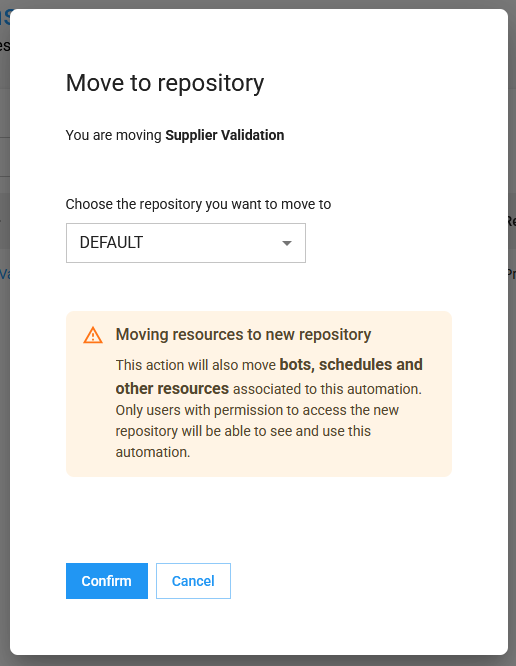
Warning
This action will also move bots, schedules and other resources linked to this Automation.