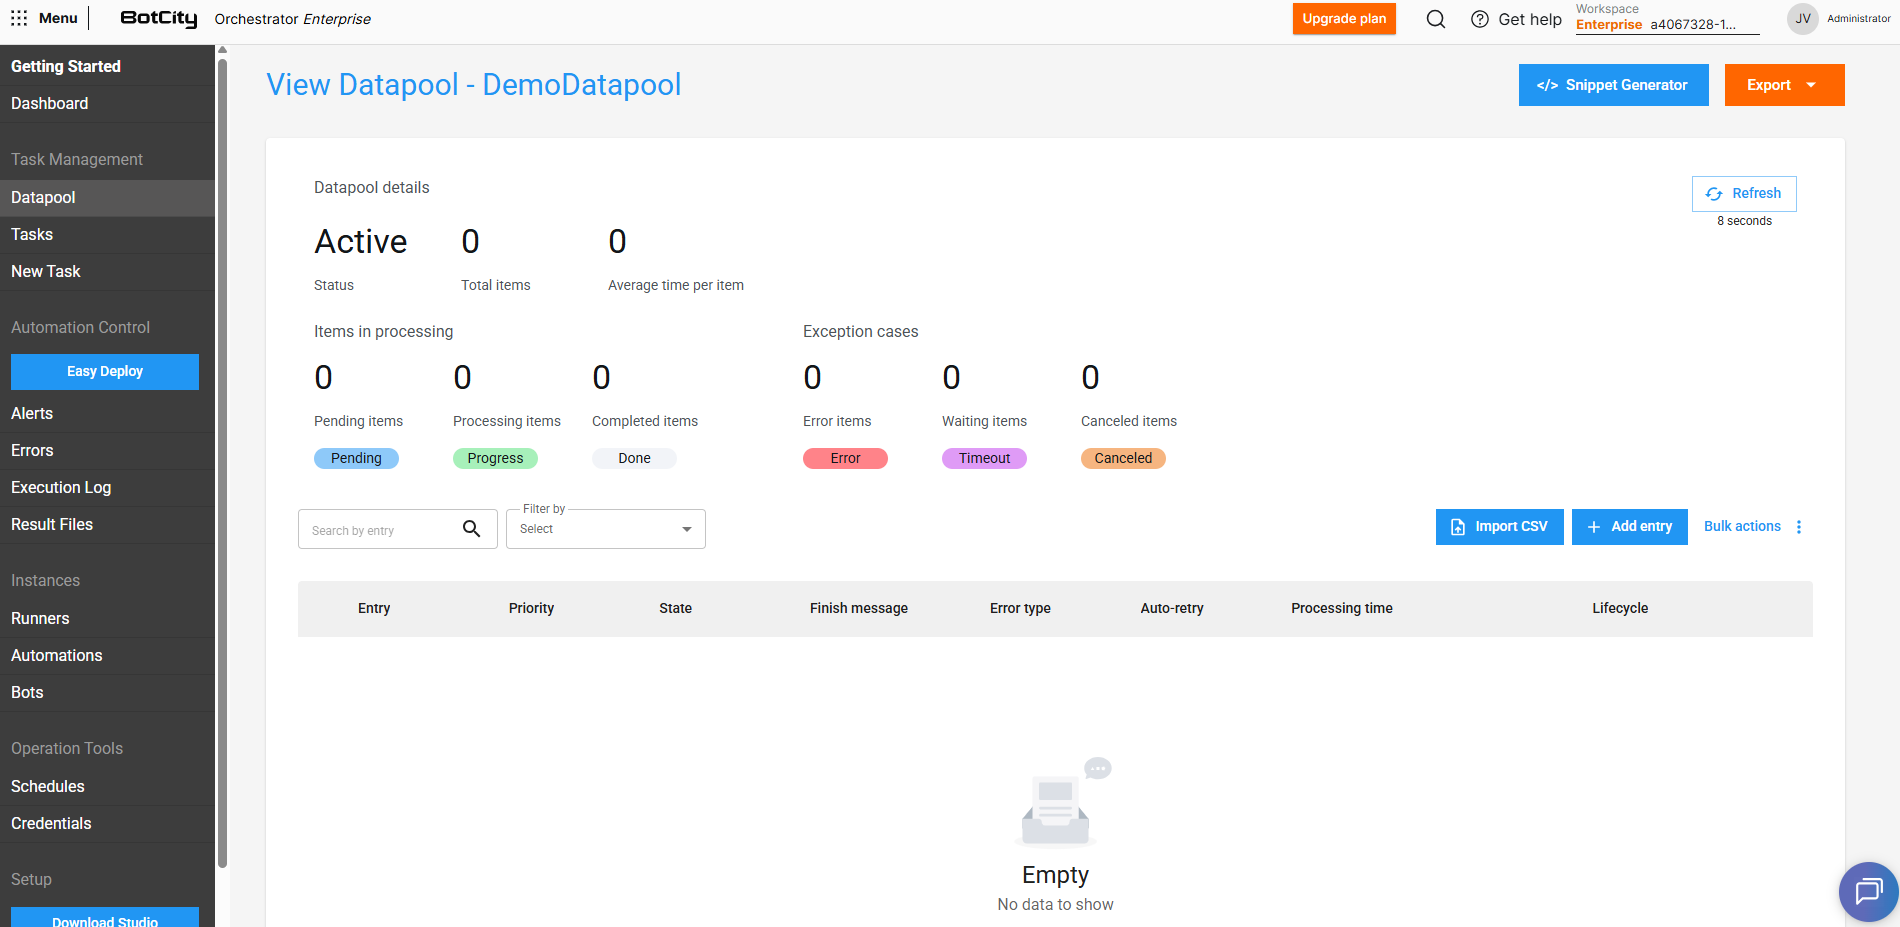
Managing Items
The Datapool allows us to efficiently manage batch item processing.
In the following sections, you will find more details about how Datapools work and how to use these resources together with your automation processes.
Adding new items to the Datapool
We can add new items to the Datapool in several different ways.
Adding each item manually
By clicking on + Add entry we can add a new item to the Datapool.
We can fill in the priority of this specific item and also the values that this item receives. Items with higher priorities will be processed first.
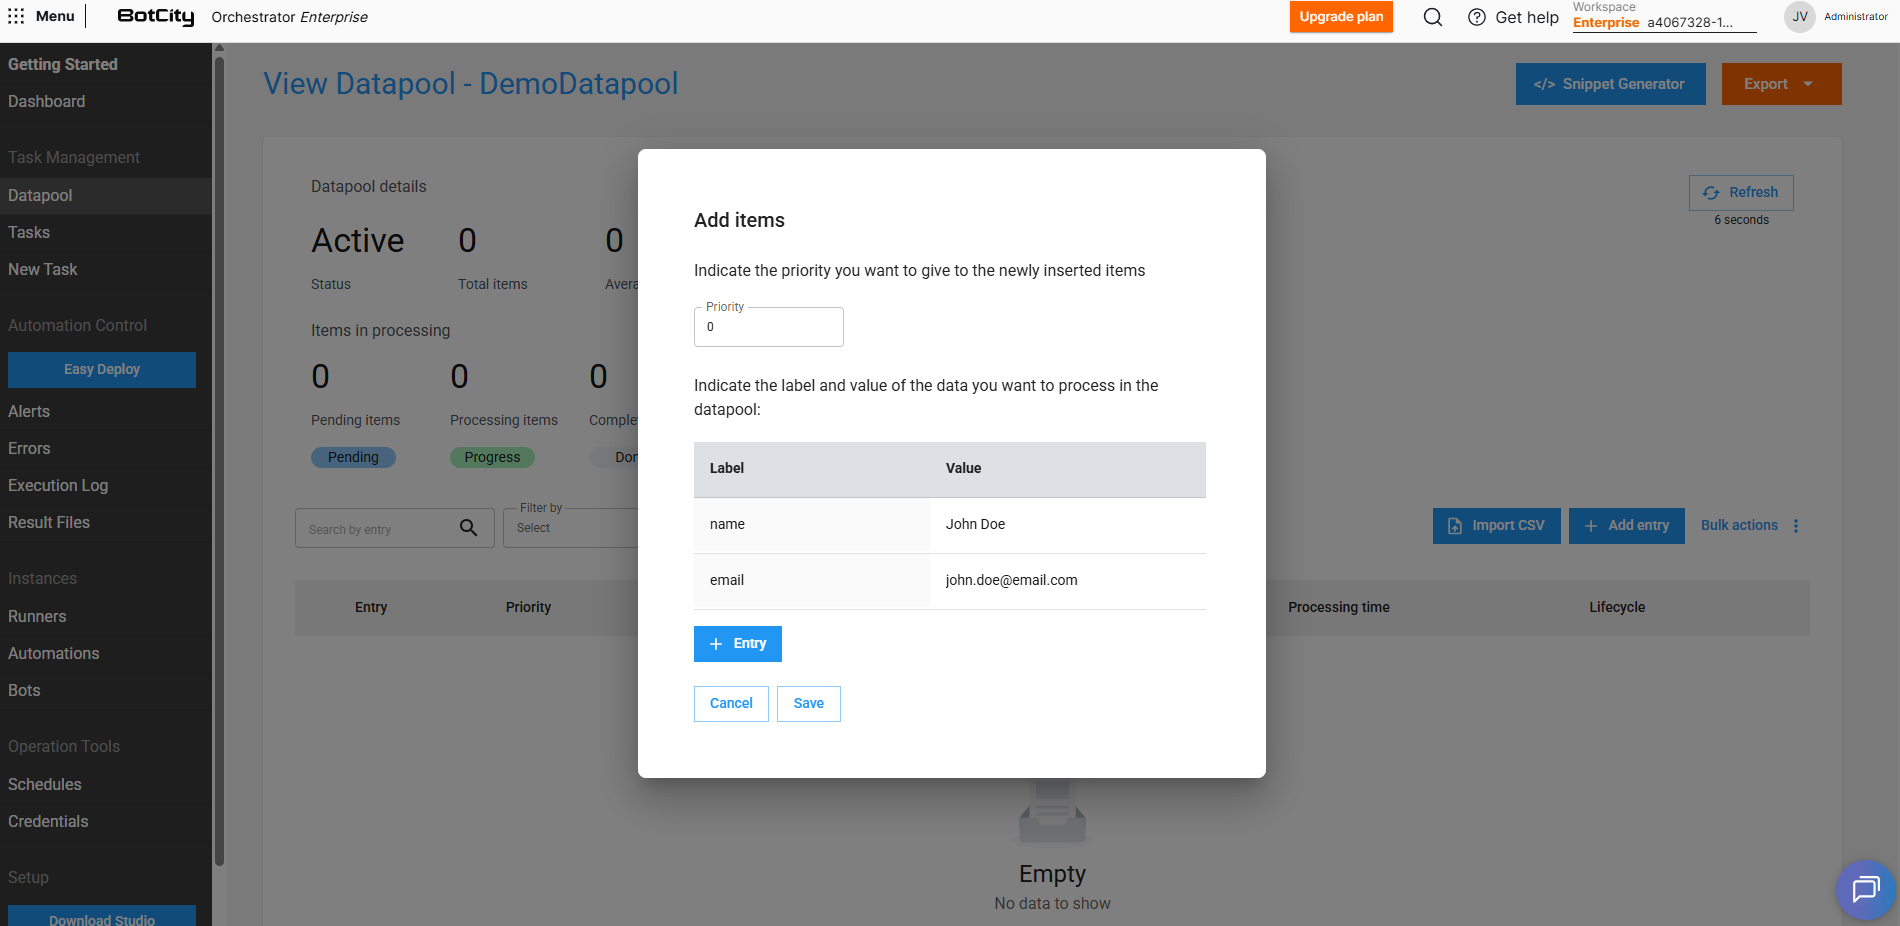
Information
In addition to filling in the values that were defined when creating the Schema, we can also add extra fields for an item through the + Entry button.
Adding items through a CSV file
Besides adding items manually, we can also include several items at once through a .csv file.
When selecting the Import CSV option, we can download a sample file and fill it with the information of the items that will be added to the Datapool.
Once done, just upload the file and click Add for the items to be loaded automatically.
Tip
You can also add new items to the Datapool via code, through the BotCity Maestro SDK or using the BotCity Orchestrator API.
Manipulating Datapool items
Once items have been added to the Datapool, it is possible to perform various operations.
The basic operation consists of consuming items from the queue, performing processing via code and reporting the final state.
Tip
Explore the  to get code examples that facilitate Datapool manipulations.
Access and learn how to add, consume and manipulate Datapool items via code.
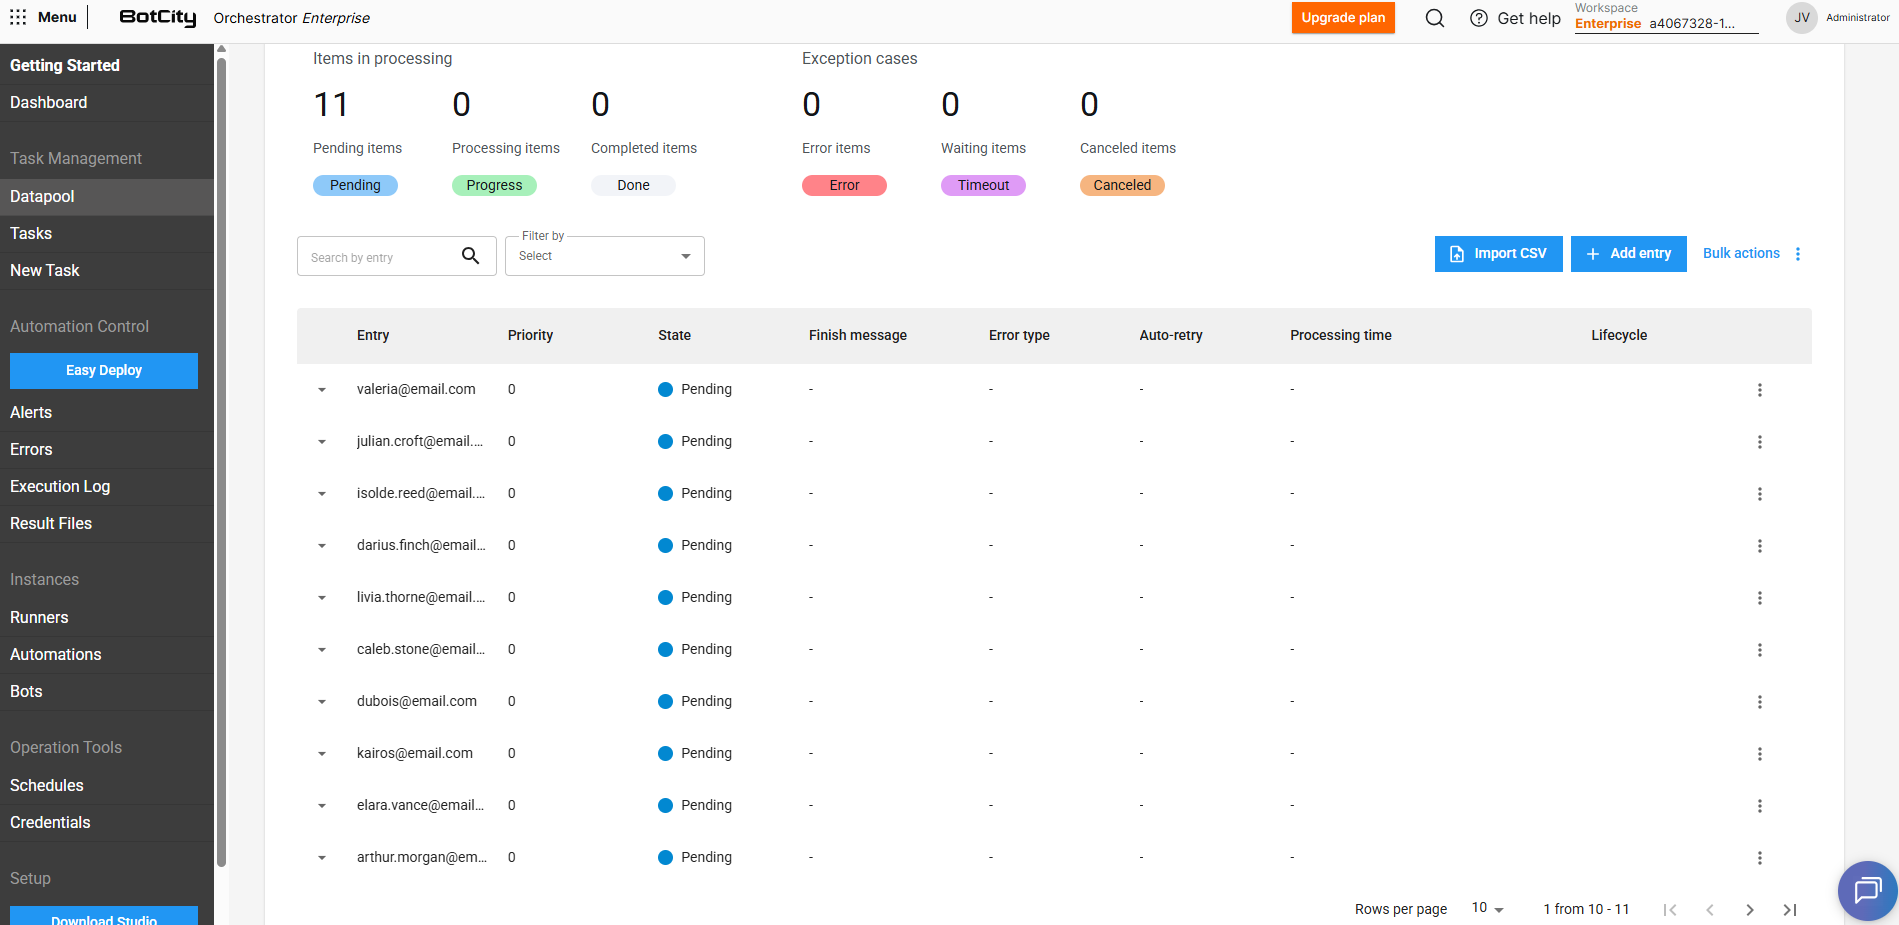
Consuming items from the queue
After adding items to the Datapool, they will remain pending in the queue awaiting processing.
Consuming queue items in automation code
Important
Consuming pending items will be done using the BotCity Maestro SDK, through your automation code.
See more details on how to consume Datapool items in the SDK Integrations section.
# Consuming the next available item and reporting the finishing state at the end
datapool = maestro.get_datapool(label="Items-To-Process")

while datapool.has_next():
    # Fetch the next Datapool item
    item = datapool.next(task_id=execution.task_id)
    if item is None:
        # Item could be None if another process consumed it before
        break

    try:
        # Processing item...

        # Example of how to get the value of a specific field
        value1 = item["<FIELD_LABEL_1>"]
        value2 = item["<FIELD_LABEL_2>"]

        # Finishing as 'DONE' after processing
        item.report_done(finish_message="Successfully processed!")

    except Exception:
        # Finishing item processing as 'ERROR'
        item.report_error(error_type=ErrorType.SYSTEM, finish_message="Processing failed.")
// Consuming the next available item and reporting the finishing state at the end
Datapool datapool = await maestro.GetDatapoolAsync("Items-To-Process");

while (await dataPool.HasNextAsync()) {
    // Fetch the next Datapool item
    DatapoolEntry item = await datapool.NextAsync(execution.TaskId);
    if (item == null) {
        // Item could be 'null' if another process consumed it before
        break;
    }

    try {
        // Processing item...

        // Example of how to get the value of a specific field
        string value1 = await item.GetValueAsync("<FIELD_LABEL_1>");
        string value2 = await item.GetValueAsync("<FIELD_LABEL_2>");

        // Finishing as 'DONE' after processing
        await item.ReportDoneAsync();

    } catch (Exception ex) {
        // Finishing item processing as 'ERROR'
        await item.ReportErrorAsync();
    }
}
Below you will see more details about item management and how processing states work.
Viewing information
For each item added to the Datapool, we can view the following information:
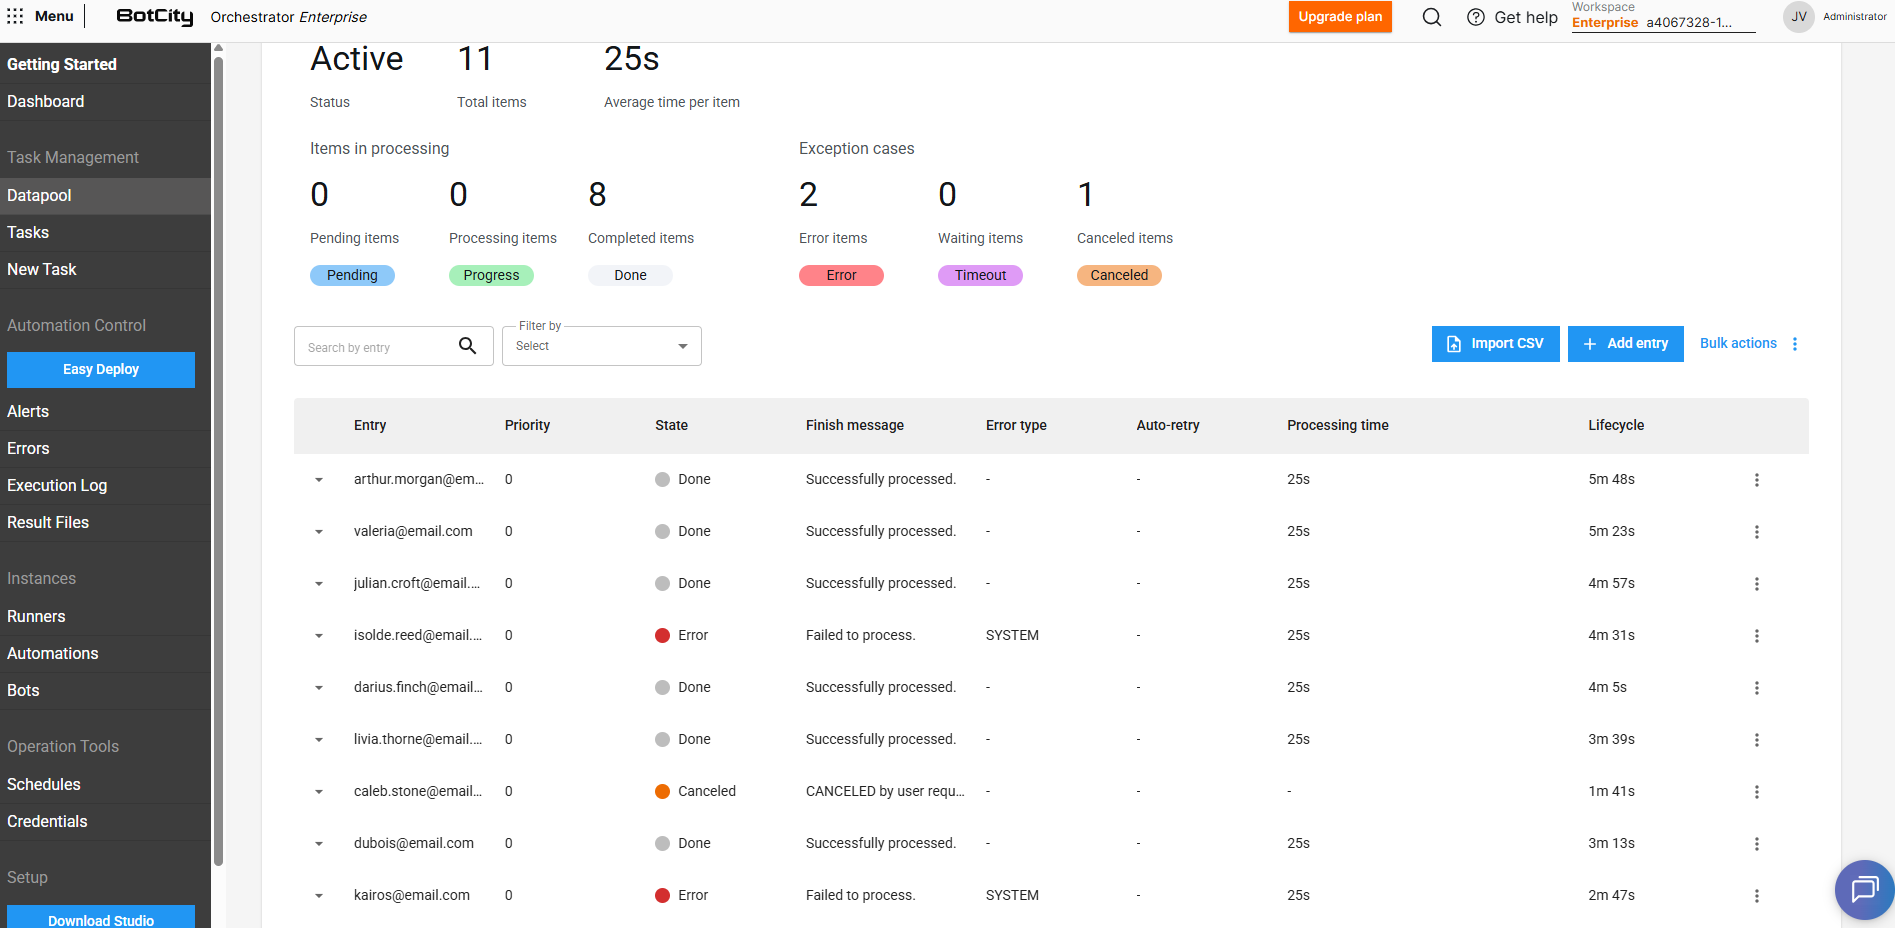
- Entry: The unique identifier of the item or a combination of fields that were marked in the
Schemato be displayed (see the section explaining Schema creation). - Priority: The priority defined for the item, items with higher priorities will be processed first.
- State: The current state of the item in the Datapool.
- Finish message: The optional finish message reported via code at the end of processing.
- Error type: The error type reported via code at the end of processing, if the item was processed with failure.
- SYSTEM: Indicates that the processing error was caused by a system error. This will be the default type if not specified in the report.
- BUSINESS: Indicates that the processing error was caused by a business failure, meaning the item finished with error due to some specific business rule.
- Auto-retry: Represents the processing attempt index, in case of items that were reprocessed.
- Processing time: The time spent processing the item.
- Lifecycle: The time taken from item creation in the Datapool until processing completion.
By expanding an item's details by clicking ▼, we can view the following additional information:
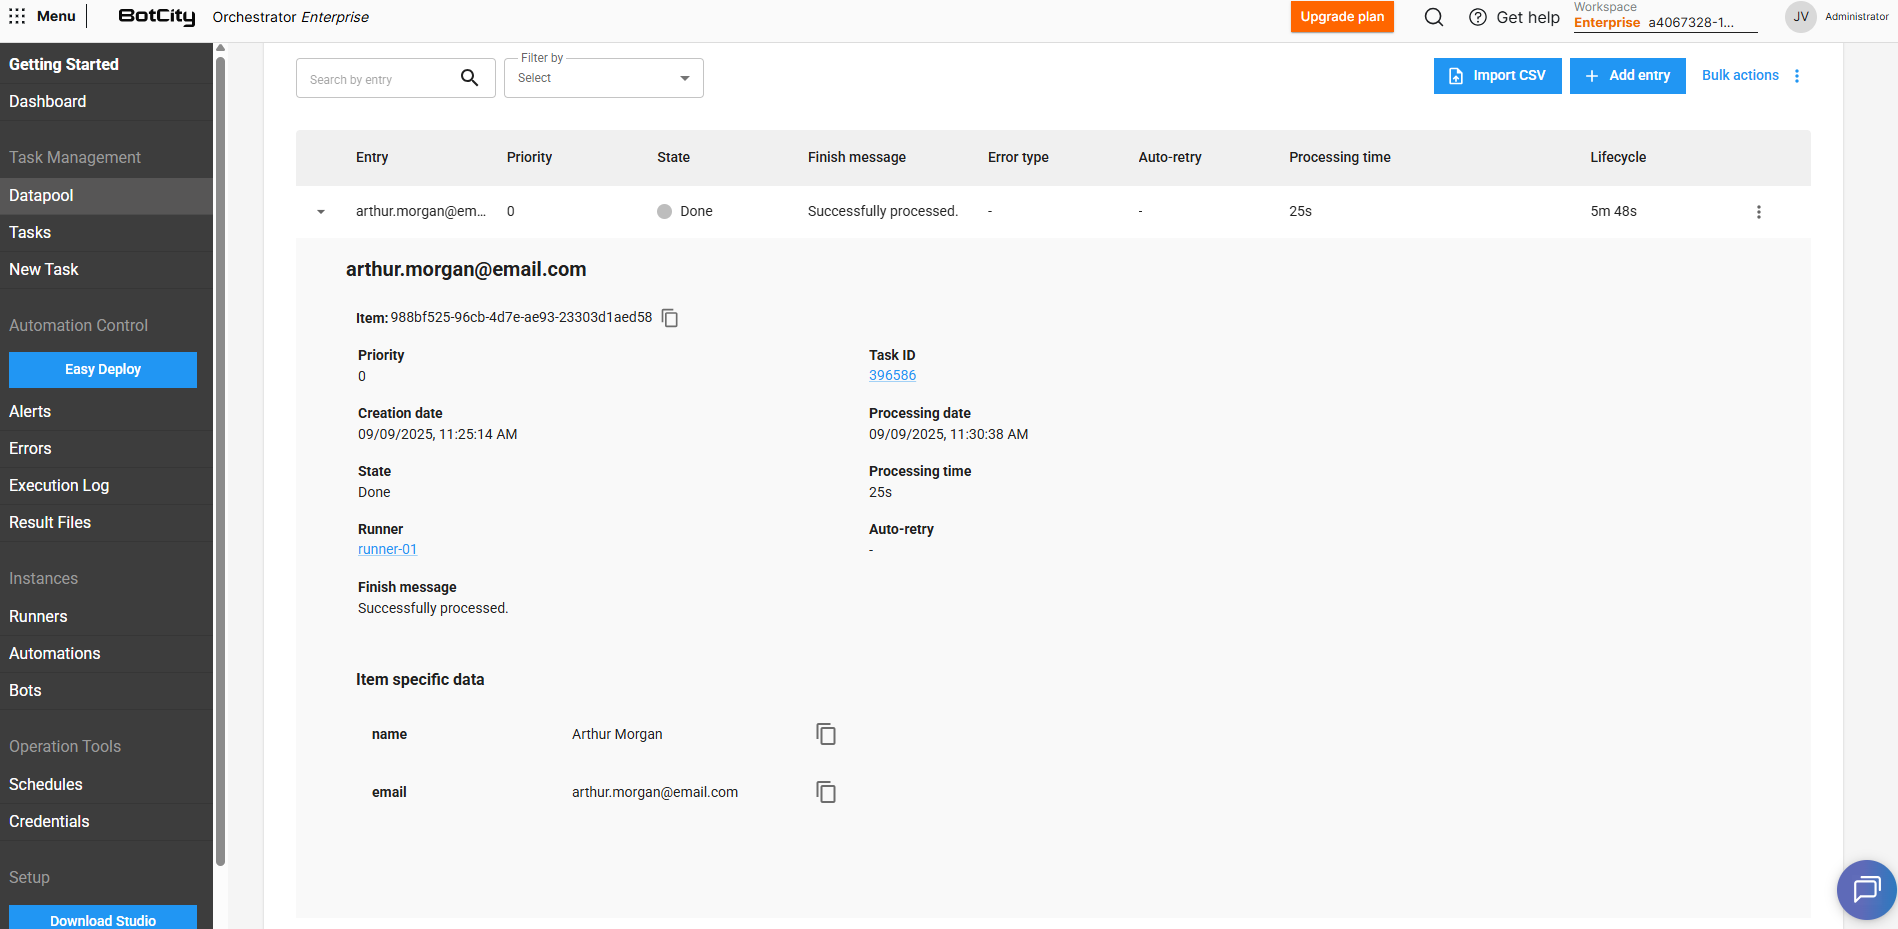
- Item: The unique identifier of the item.
- Priority: The priority defined for the item.
- Task Id: The identifier of the task responsible for accessing and consuming that Datapool item.
- Creation date: The date when the item was added to the Datapool.
- Processing date: The date when the item was pulled for processing.
- State: The current state of the item in the Datapool.
- Processing time: The time spent processing the item.
- Runner: The Runner responsible for executing the task that consumed the item.
- Auto-retry: Represents the processing attempt index, in case of items that were reprocessed.
- Finish message: The optional finish message reported via code at the end of processing.
- Item-specific data: The key/value sets that compose the Datapool item.
Editing data of pending items
For items that are in PENDING state, we can edit the filled values and add new fields.
By expanding an item's details and clicking Edit, it is possible to adjust previously defined values.
By clicking + Entry, you can include as many additional fields as needed for that specific item.
Lifecycle and processing states
As we saw earlier, when adding a new item to the Datapool, it will initially have the PENDING state.
We can understand the states that an item can assume during its lifecycle as follows:
PENDING: The item is awaiting processing, at this point it will be available to be accessed and consumed.
PROCESSING: The item was pulled for execution and is in the processing phase.
DONE: Item processing was completed successfully.
ERROR: Item processing was completed with error.
SYSTEM: Indicates that the processing error was caused by a system error.BUSINESS: Indicates that the processing error was caused by a failure in business rules. Errors of typeBUSINESSare not considered in the scenarios of Auto-retry and Abort on error.
CANCELED: The item was canceled and will not be pulled for processing.
TIMEOUT: Item processing is in a timeout phase (this can occur when the item's completion state is not reported via code).
Understanding the TIMEOUT state
The TIMEOUT state is based on the time that was defined in the Processing time property when creating the Datapool.
If an item's processing exceeds the defined maximum time, either due to lack of reporting indicating the item's state or some execution hang that prevents the report from being made, the Datapool will automatically indicate that the item has entered a TIMEOUT state.
This does not necessarily mean an error, as an item can still go from TIMEOUT state to DONE or ERROR state.
However, if the process does not recover (in case of eventual hangs) and the item state report is not made, the Datapool will automatically consider that item's status as ERROR after a period of 24 hours.
Reporting an item's state
The step of reporting an item's finish state is crucial for the Datapool states and counters to be updated correctly.
For this, it is necessary that the finish state of each item (DONE or ERROR) be reported via code within the process logic.
Reporting an item's state in automation code
Important
Items reported with errors of type BUSINESS will not be considered for the scenarios of auto-retry and abort on error.
For these scenarios, only items with error type SYSTEM will be considered.
See more details about reporting an item's state in the SDK Integrations section.
# Fetch the next Datapool item
item = datapool.next(task_id=execution.task_id)

# Finishing as 'DONE' after processing
item.report_done(finish_message="Successfully processed!")

# Finishing item processing indicating a system error
item.report_error(error_type=ErrorType.SYSTEM, finish_message="System unavailable.")

# Finishing item processing indicating a business error
item.report_error(error_type=ErrorType.BUSINESS, finish_message="Invalid data.")
If the item's processing state is not reported for some reason, and the processing time exceeds the value that was defined in the Processing time property, this will cause the Datapool to automatically assign a TIMEOUT state to that item.
Datapool <> BotCity Insights
Reporting items in the Datapool does NOT have direct impact on metrics calculated by BotCity Insights.
To have updated metrics, it is strictly necessary to:
- Ensure that automation financial data is properly configured in the Data Input section within Insights.
- Ensure that reporting on processed items is done correctly when finishing the task at the end of execution.
See more details in the BotCity Insights section.
Operations with Datapool items
Besides viewing information, we can perform some operations by accessing each item's actions menu:
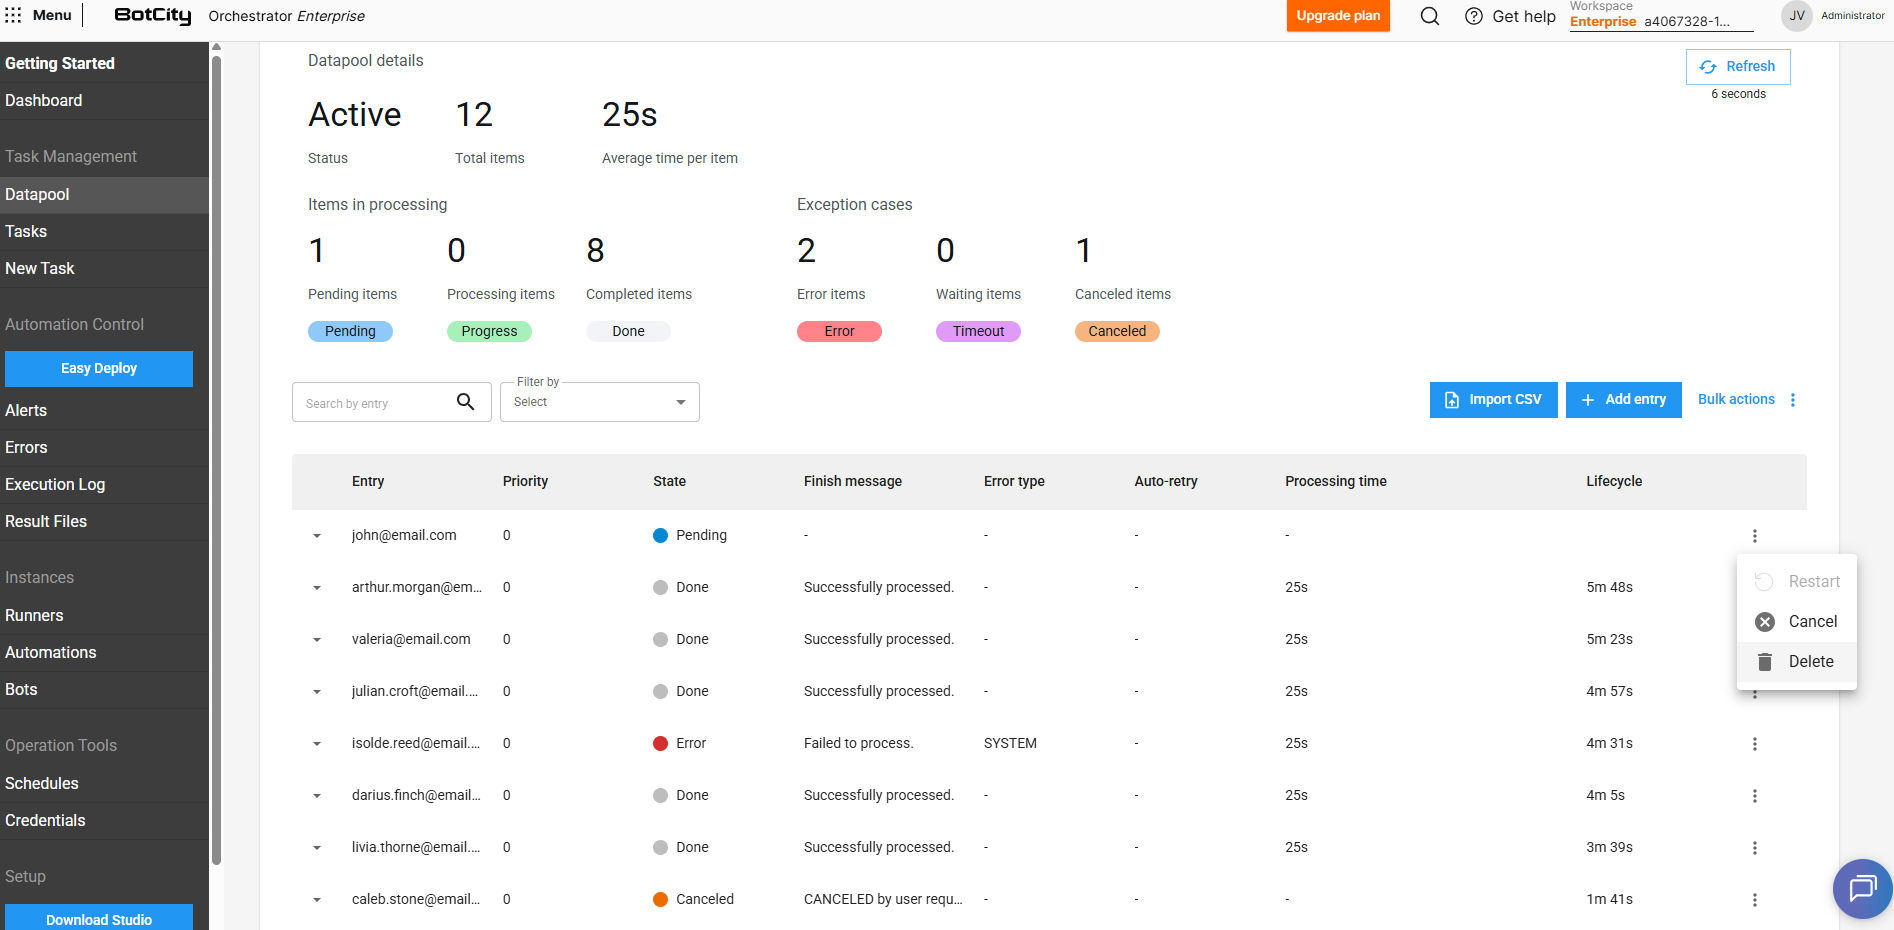
Restart
Inserts a copy of the current item in the Datapool so it can be processed again.
Restarting items with unique ID fields
If you are using fields with unique ID function, it will not be possible to restart an item that has already been processed.
In this case, it is necessary for the existing item to be deleted so that a new item using the same unique ID can be inserted into the Datapool.
Cancel
Cancels an item that has not yet been pulled for processing (PENDING). In this case, the item will be ignored during queue consumption.
Delete
Removes the item from the queue and Datapool history. It is not possible to delete items that are in PROCESSING or TIMEOUT state.
Tip
Through the Bulk actions feature it is also possible to cancel or delete multiple items, if you need to perform these operations for a large volume of entries.
Filtering items in the queue
The Datapool has a filter feature that allows us to search for queue items by filtering by date or current state.
Additionally, it is also possible to search for a specific item using entry values as filters.
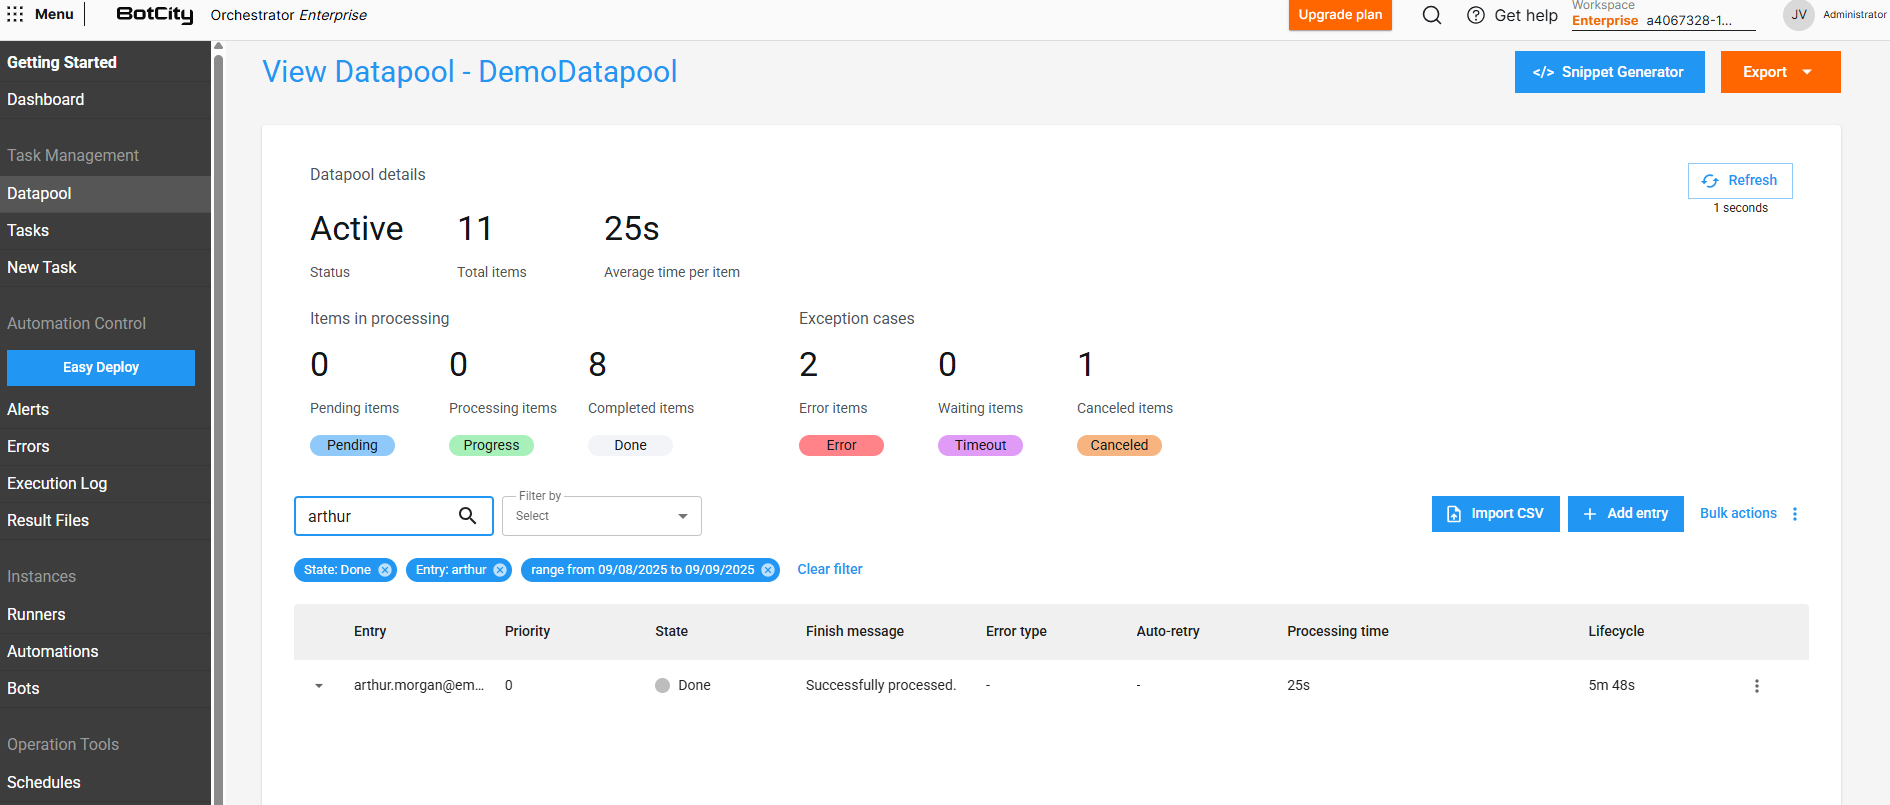
Important
For a field to be used in search, it is necessary that the Display value option is checked in the field configuration within the Schema.
Exporting item data
In the main Datapool panel we can easily export queue items.
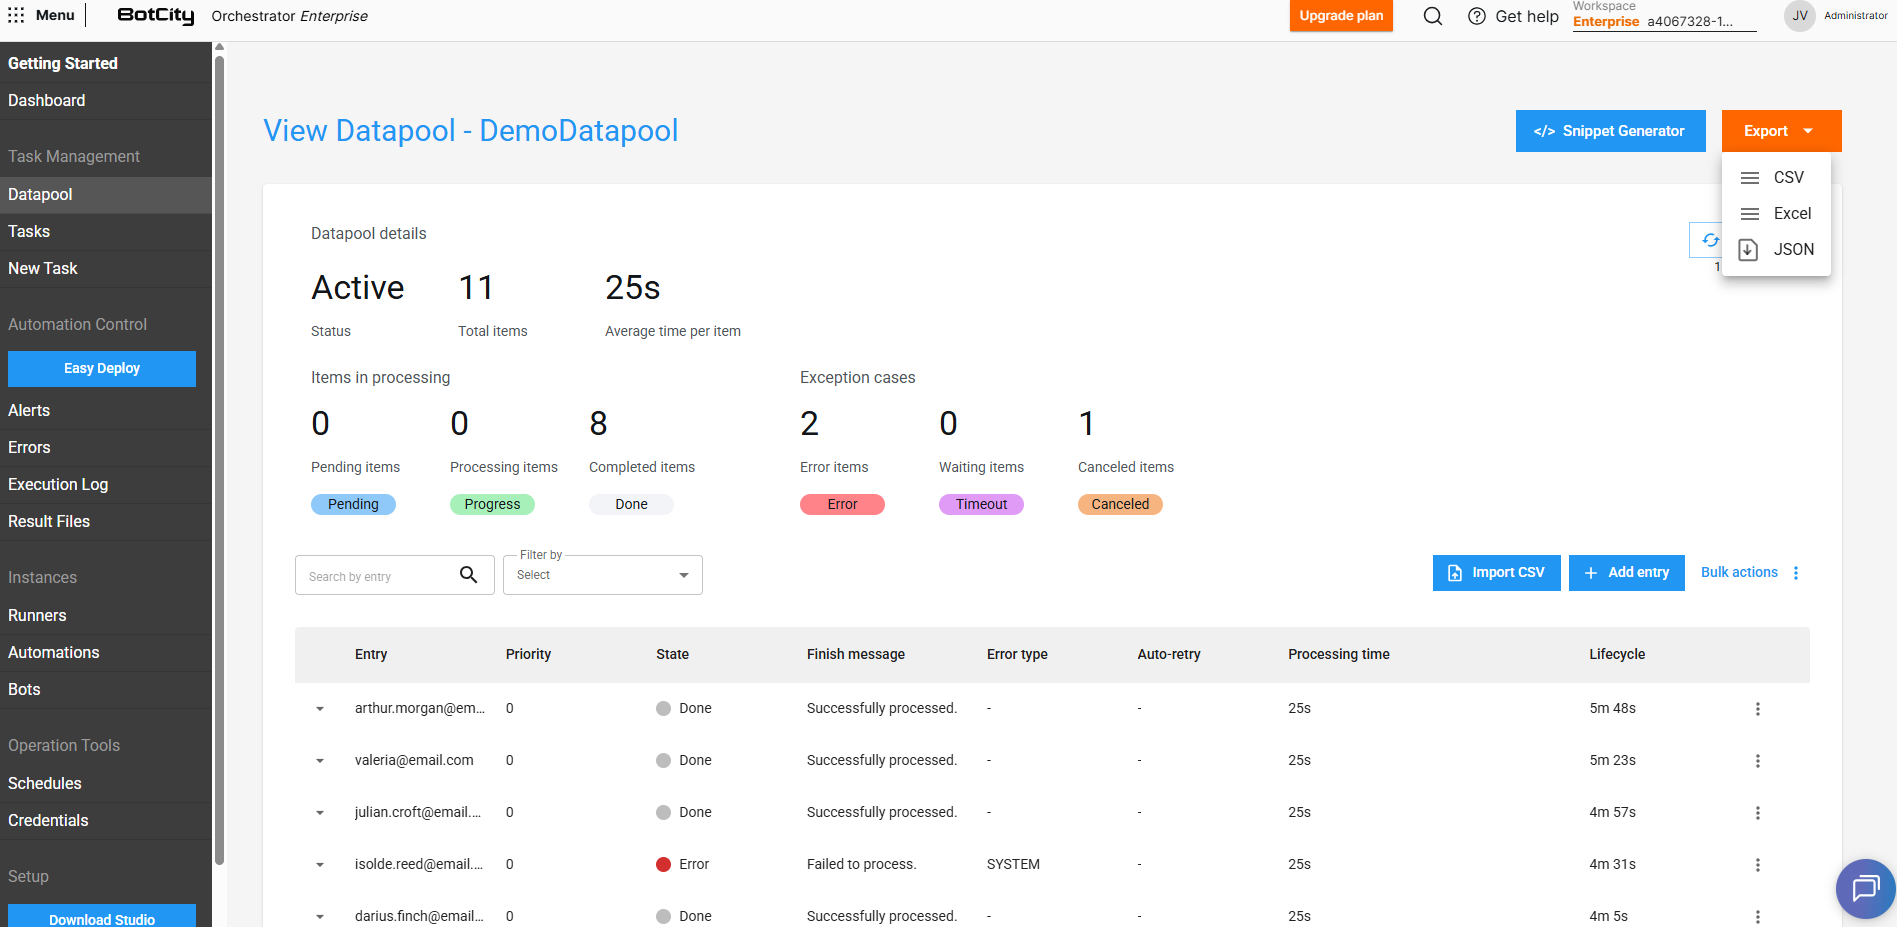
Through the Export button we can choose the most appropriate format and thus easily obtain data regarding the item processing history.