Getting Started
Creating a Datapool
To create a new Datapool, simply click on + New Datapool and configure it in 4 simple steps:
Step 1 - Basic Information
In this step, you must provide the initial information about the Datapool being created.
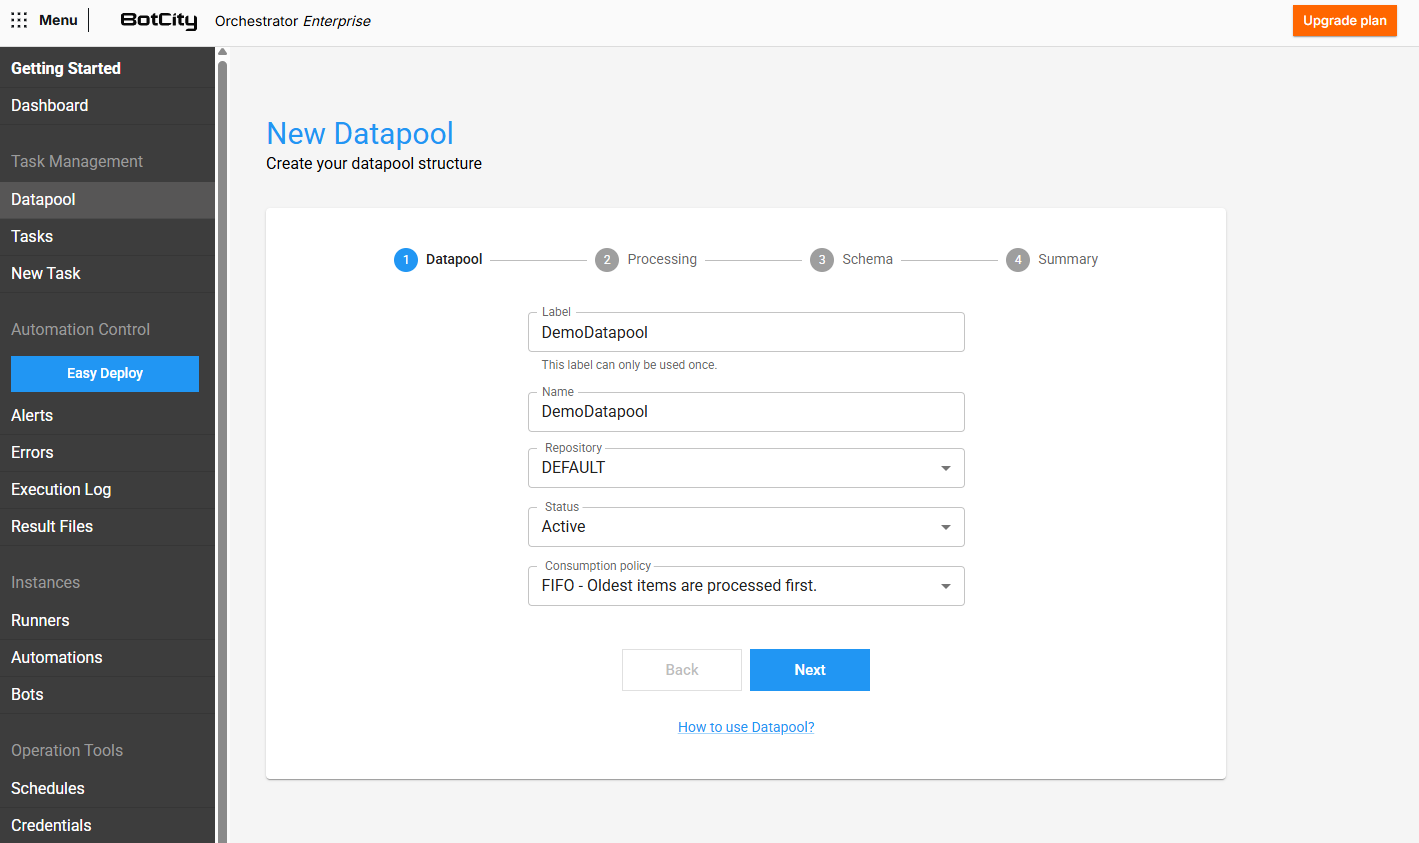
- Label: The unique identifier that will be used to access the Datapool.
- Name: The display name that will be used to identify the Datapool.
- Repository: The workspace repository where the Datapool will be contained.
- Status: If
ACTIVE, the Datapool will be available to be accessed and consumed. - Consumption policy: You can choose between two consumption policies:
- FIFO: The first item to be added to the Datapool will also be the first item to be processed.
- LIFO: The last item to be added to the Datapool will be the first item to be processed.
Step 2 - Processing Settings
In this step, you must configure the Datapool behavior during item processing.
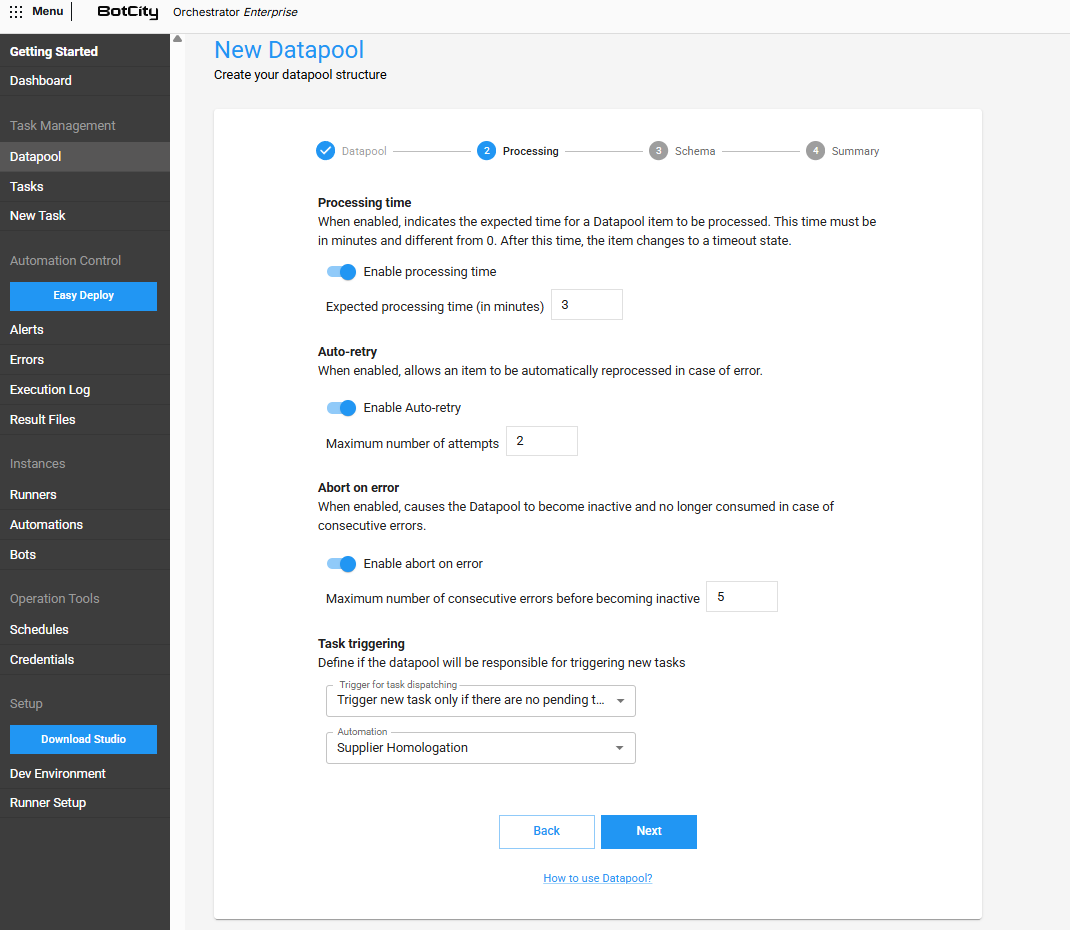
Processing time
When enabled, allows you to define the expected time (in minutes) for a Datapool item to be processed under normal conditions.
Auto-retry
If enabled, allows an item to be automatically reprocessed in case of error.
- Maximum number of attempts: The maximum number of attempts for an item to be processed successfully.
Important
Only items with error type SYSTEM will be considered for this scenario.
Abort on error
If enabled, makes the Datapool inactive and no longer consumed in case of consecutive errors.
- Maximum number of consecutive errors before becoming inactive: Maximum amount of items processed with error consecutively that will be tolerated until the Datapool becomes
INACTIVE.
Important
Only items with error type SYSTEM will be counted for this scenario.
Triggers and task dispatching
You can define if the created Datapool will also be responsible for dispatching new tasks:
- Never trigger new task: The Datapool will never be responsible for dispatching tasks from an automation process.
- Trigger new task for each added item: Whenever a new item is added to the Datapool, a new task from a specific automation process will be created.
- Trigger new task only if there are no pending tasks: Whenever a new item is added, the Datapool will dispatch a new task from an automation process only if there are no tasks from this process being executed or pending.
- Automation: The automation process that will be used by the Datapool to dispatch new tasks, if any trigger is being used.
Step 3 - Schema Creation
In this step, you can define the structure of items that will be added to the Datapool, that is, which fields will compose each item.
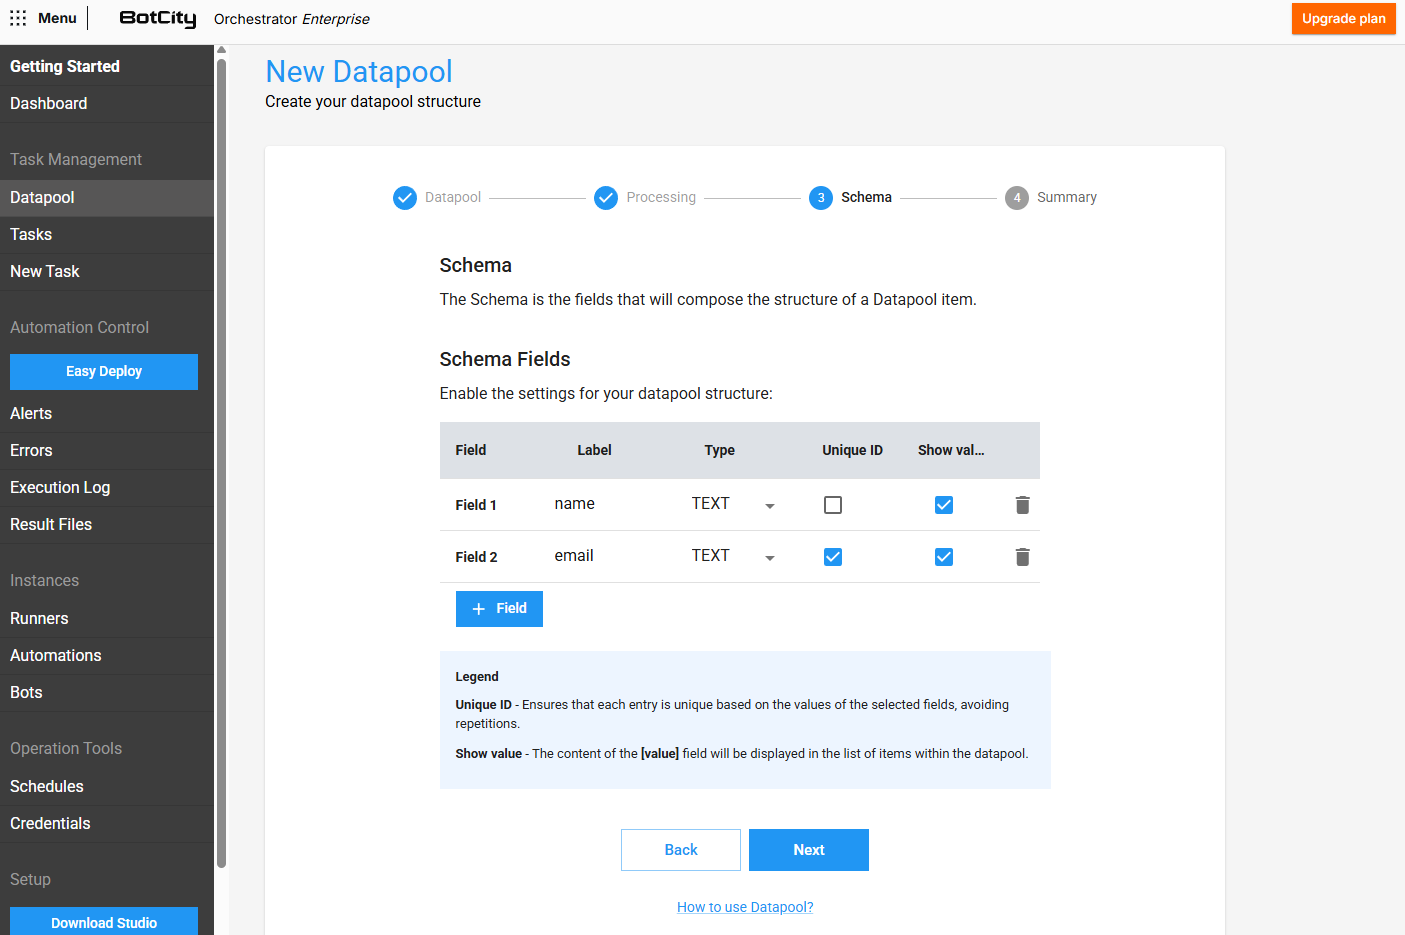
For each new field added, you can define:
- Label: The unique identifier that will be used to access this field.
- Type: The expected type for this field's value (
TEXT,INTEGER,DOUBLE). - Unique ID: If checked, the field will represent a "unique key" for the item, meaning it will not be allowed to add duplicate items that have the same value for this specific field.
- Show value: If checked, this field's value will be displayed in the Datapool items list, serving as a visual identifier for the items in question.
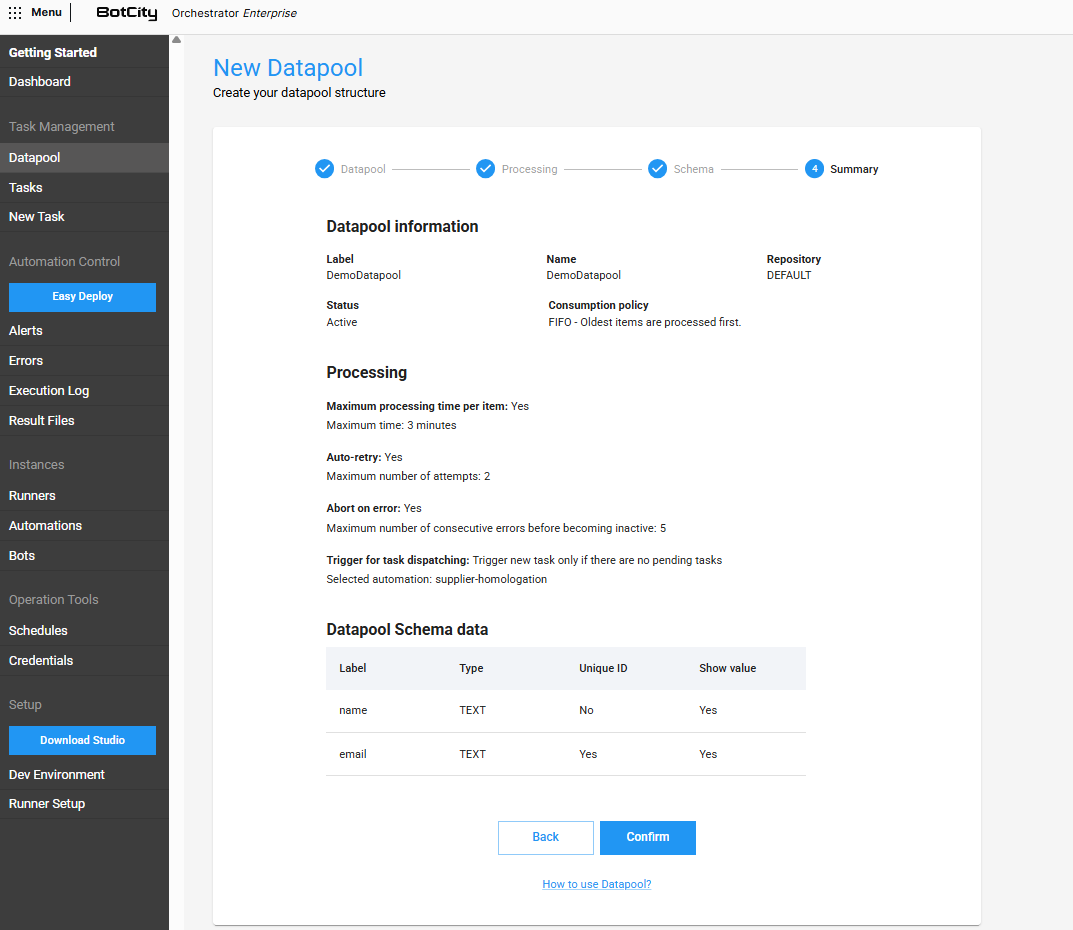
Step 4 - Summary
In this final step, you can review all the information that was defined in the previous steps and, if necessary, make adjustments before creating the Datapool.
Datapool Operations
Besides creation, you can also perform other operations with the Datapool. Through the actions menu, it is possible to:

- View the main panel and the information currently configured for the Datapool.
- Activate or deactivate the Datapool, that is, allow added items to be consumed or not.
- Edit the configurations that were previously defined.
- Delete the Datapool, permanently removing it from the workspace in the Orchestrator.
Next Steps
With the Datapool structure created and configured, the next step is to start adding the items that will be processed.