How to Open a Ticket
This guide shows how to open a ticket for the BotCity support team and track the service.
My area
On the My Area page, you track the status of your tickets.
Knowledge Base
Many common questions and errors already have a documented solution. Before opening a ticket, check BotCity's self-service content: you may solve the problem right away, without waiting for support.
Check the FAQs before opening a ticket
Both sources are updated frequently:
- Knowledge Base: articles and FAQs from the support portal, with solutions to the issues most often handled by the team.
- Frequently asked questions (FAQ): documentation answers to common questions, such as network blocks during installation, dependency errors when running the automation, and Community account limits.
Support channels
You can open a ticket through different channels. Choose the most convenient one for you, considering the level of detail each one provides:
| Channel | Submission | Notes |
|---|---|---|
| Support portal | Full form | Recommended channel. The form guides you through all the information the support team needs. |
| Chat on the support portal or in the Orchestrator | Form in the chat | Faster, because you open the ticket without leaving the Orchestrator. Include as many details as possible. |
| Email (support@botcity.dev) | The email you send becomes a ticket | Convenient, but it doesn't indicate which information to send. If any information is missing, the service may take longer. |
Open a ticket
Go to the New Ticket page and fill out the ticket form.
General information
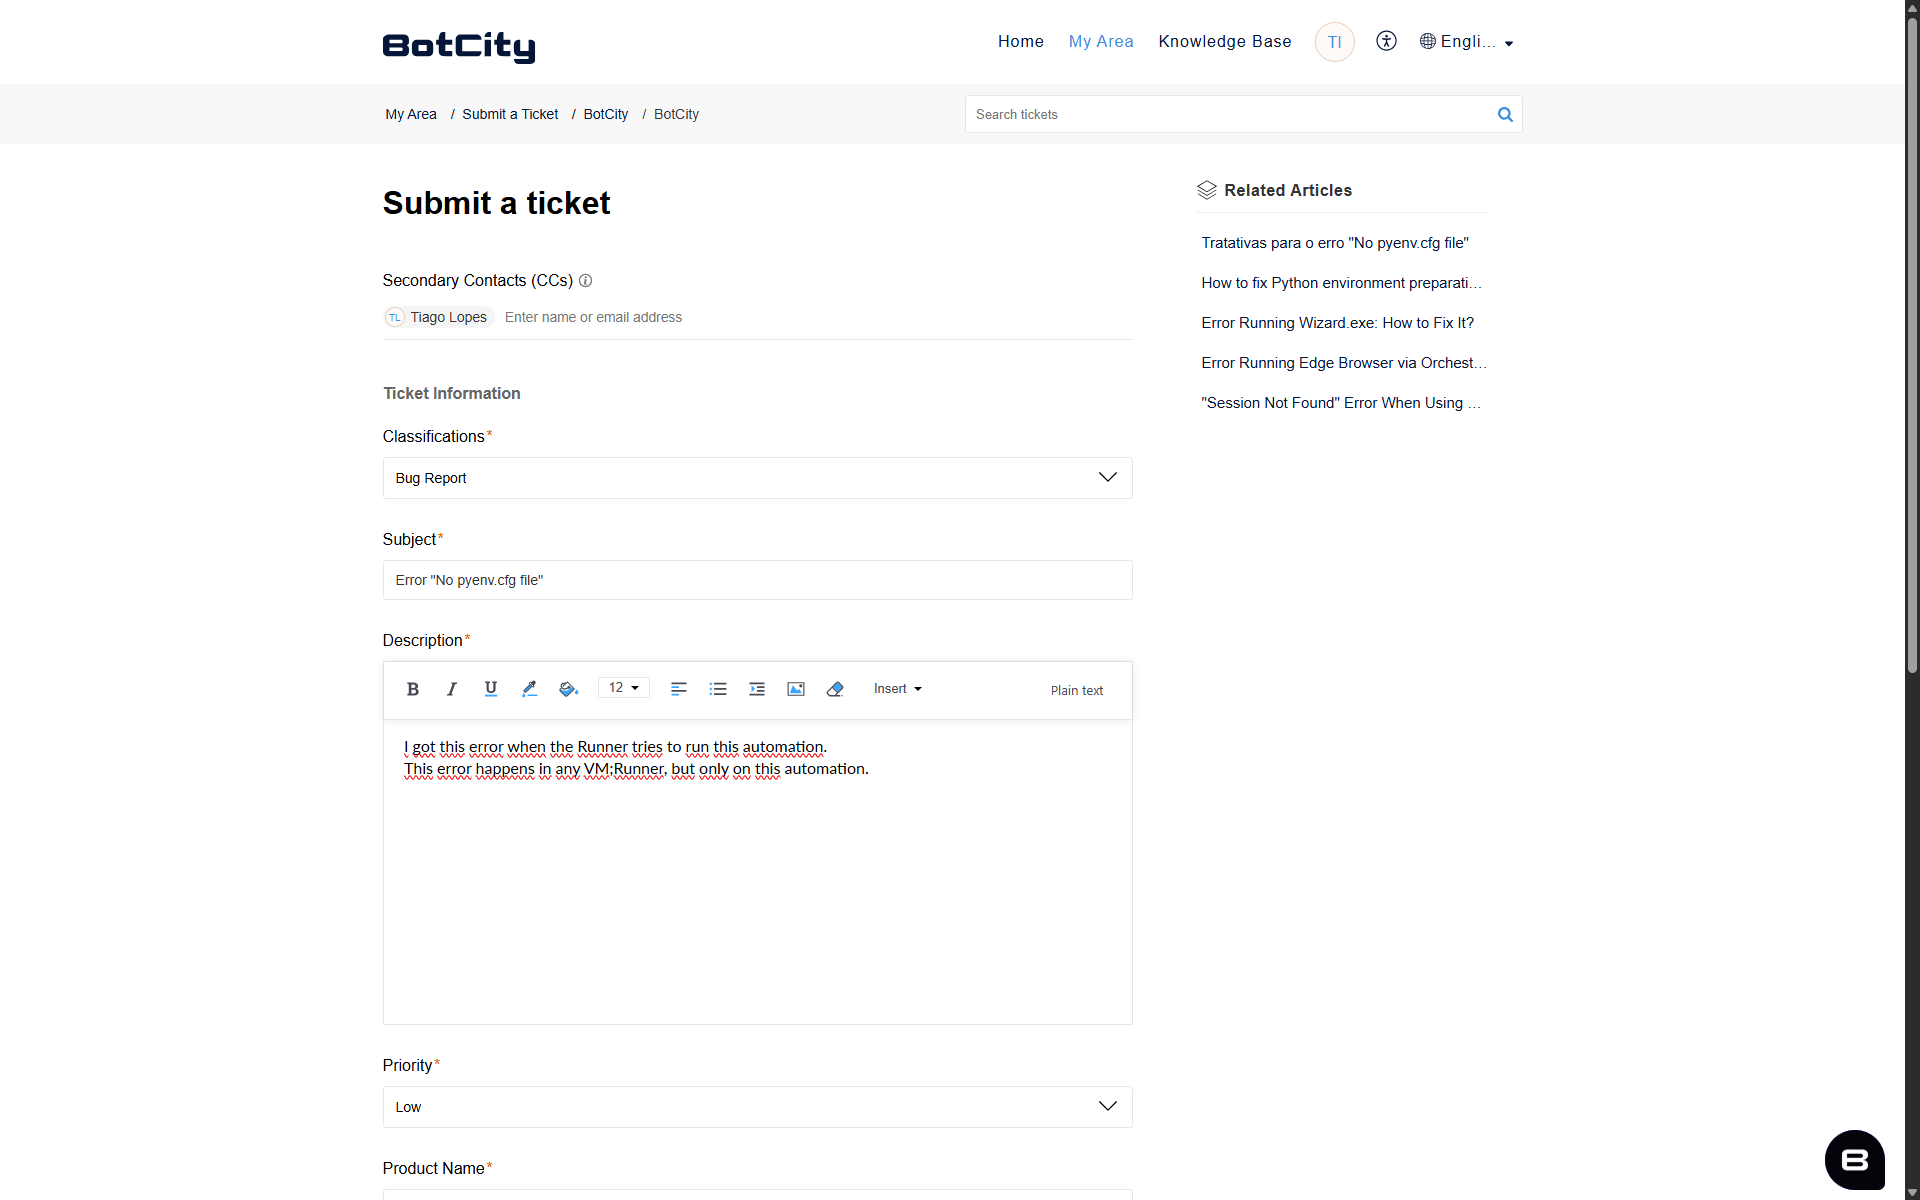
- Secondary contacts (CCs): additional emails of the people who will follow the ticket.
- Classifications: select the request type:
- Question: ask the support team a question.
- Report a bug: report a bug or error for the support team to analyze and fix.
- Request a Feature: request the creation of a feature.
- Hands On: request consultative support to help you get hands-on.
- Tech Follow: request periodic follow-up from the support team.
- Consultative support: request guidance from the support team on best practices and technical decisions for your automation operation.
-
Subject: ticket title.
Check the suggested articles
As you fill in the ticket title, the portal suggests articles on the right side of the page. Read the suggested articles, because they may solve your problem faster.
-
Description: full description of the problem found.
Describe the problem in detail
The more detailed the description, the faster the support team can reproduce and prioritize the issue. Whenever possible, include:
- What you were doing: the action or flow in which the problem happened.
- Error message: the exact error text, copied from the screen or the log.
- Where it happened: the name of the automation, the task ID, and the Runner involved.
- When it happened: the approximate date and time, with the time zone.
- Frequency: whether the problem always happens, sometimes happens, or happened only once.
- Recent changes: changes to the code, the environment, or versions made before the problem.
-
Priority: select the impact level of the request. The response time for each priority is in the Deadlines table.
- High: operation stopped.
- Medium: operation delayed.
- Low: no impact on the operation.
- Feature: improvement suggestion.
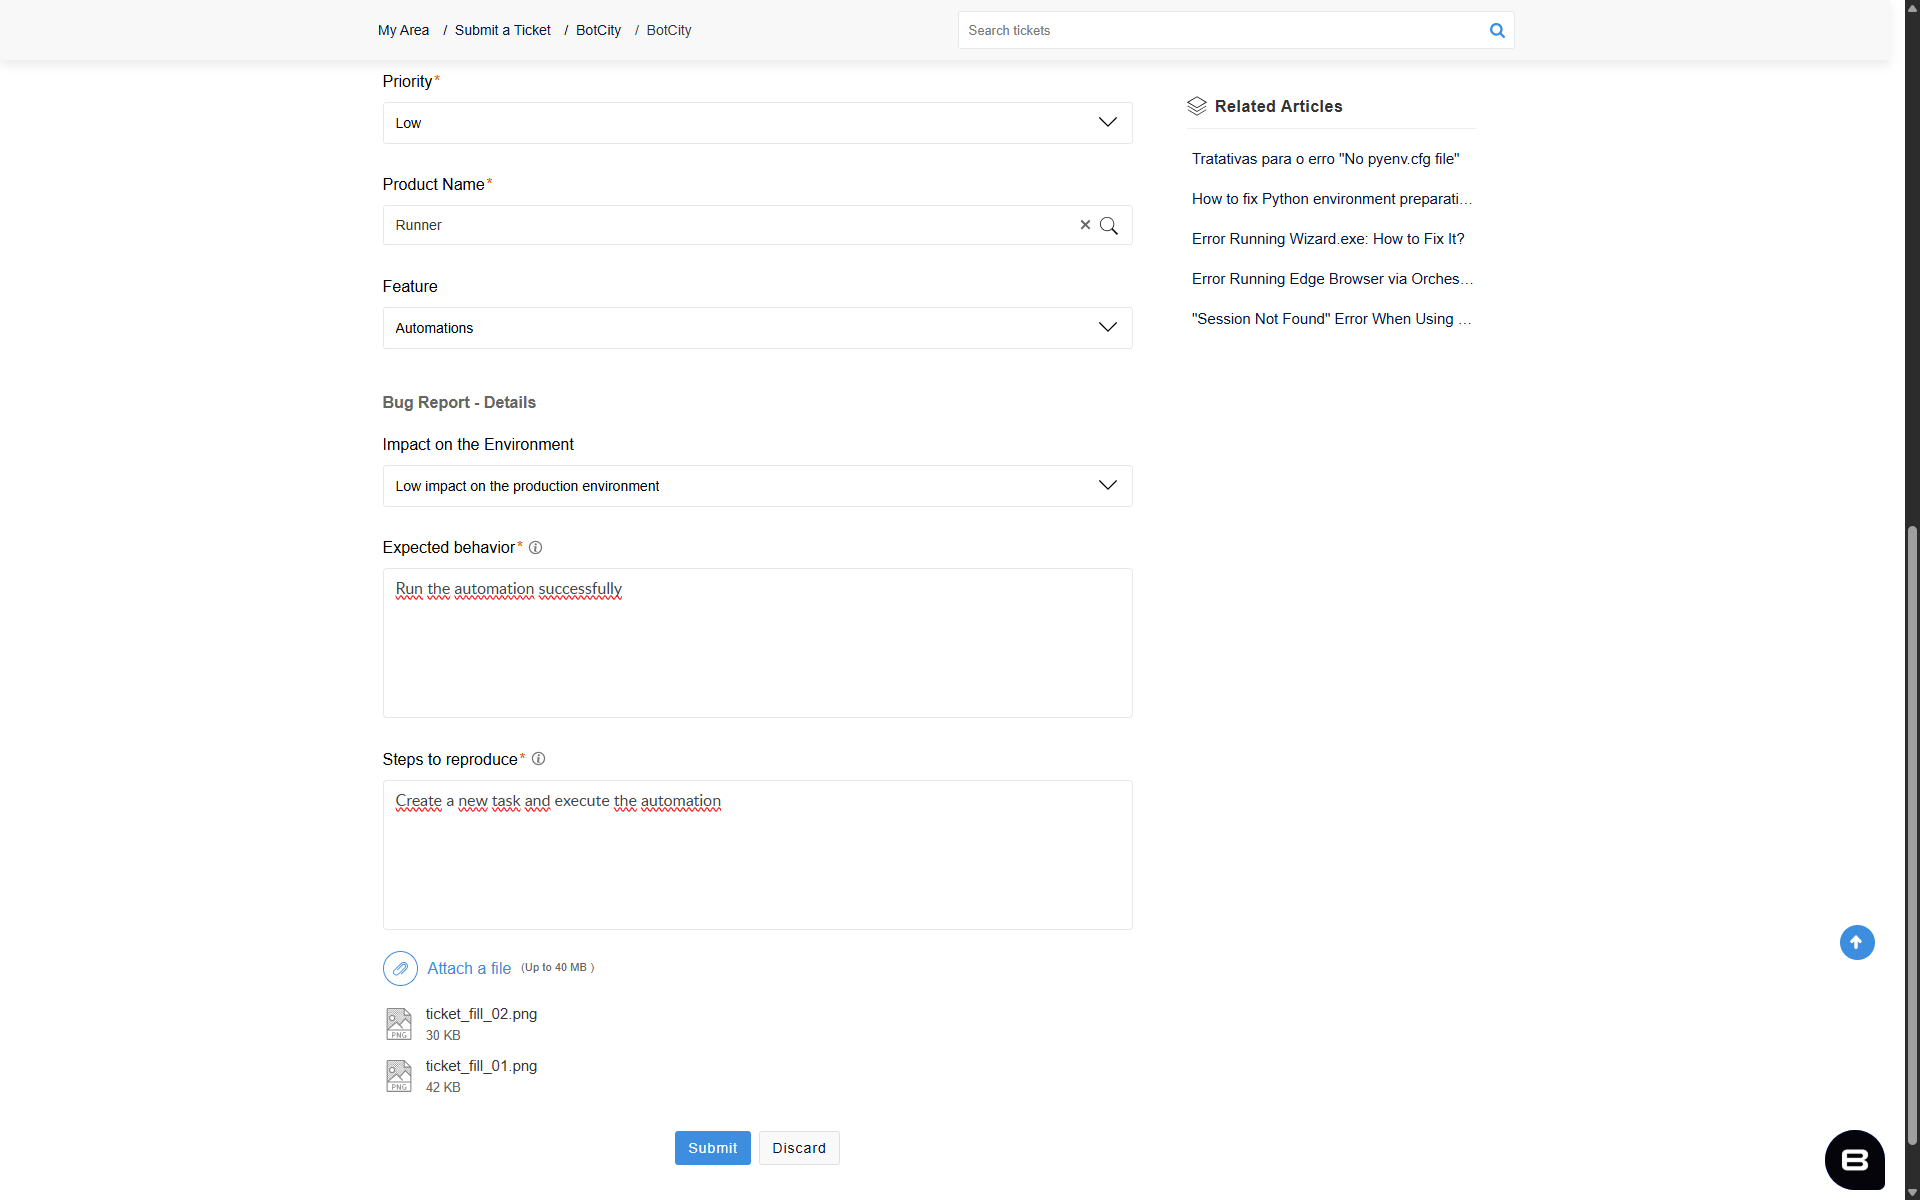
- Product name: indicate the product in which the error occurs:
- Academy
- Consultative Support
- Insights
- Orchestrator
- Runner
- SDK and Frameworks
- Session Manager
- Studio
-
Attach a file: send the files that help the support team analyze the error:
- Runner or execution errors: send the Runner log, located at
\BotCity\logs\log.txt. - Package download or extraction error: send the Runner log, located at
\BotCity\logs\log.txt, and a screenshot of the\BotCity\run\temp\folder.
Attach as much information as possible
The more information, the faster the support team can reproduce and prioritize the issue.
- Runner or execution errors: send the Runner log, located at
Specific information
Depending on the selected classification, the form shows additional fields.
- Request a Feature:
- Feature Request Type: select whether it is a new feature or an improvement to an existing feature.
- What is your suggestion or improvement: describe the feature or improvement you propose.
- Use case examples: describe real situations in which the feature would be used.
- What problem will this feature solve: explain the current difficulty or limitation that the feature solves.
- Do you know any similar product or reference: if any, indicate products or references with a similar feature.
- Report a bug:
- Feature: select from the list the feature affected by the error.
- Bug priority: select from the list the impact of the error on your production environment.
- Expected behavior: describe the behavior that should occur if there were no error.
- Steps to reproduce: if possible, provide the steps that led to the error.
- Consultative support:
- What type of assistance do you need: describe the type of guidance you expect from the support team.
- Define the expected result or solution: explain what you expect to achieve at the end of the service.
Review before submitting
Before submitting the ticket, review all the information you filled in.
Example of a completed ticket
Track the ticket
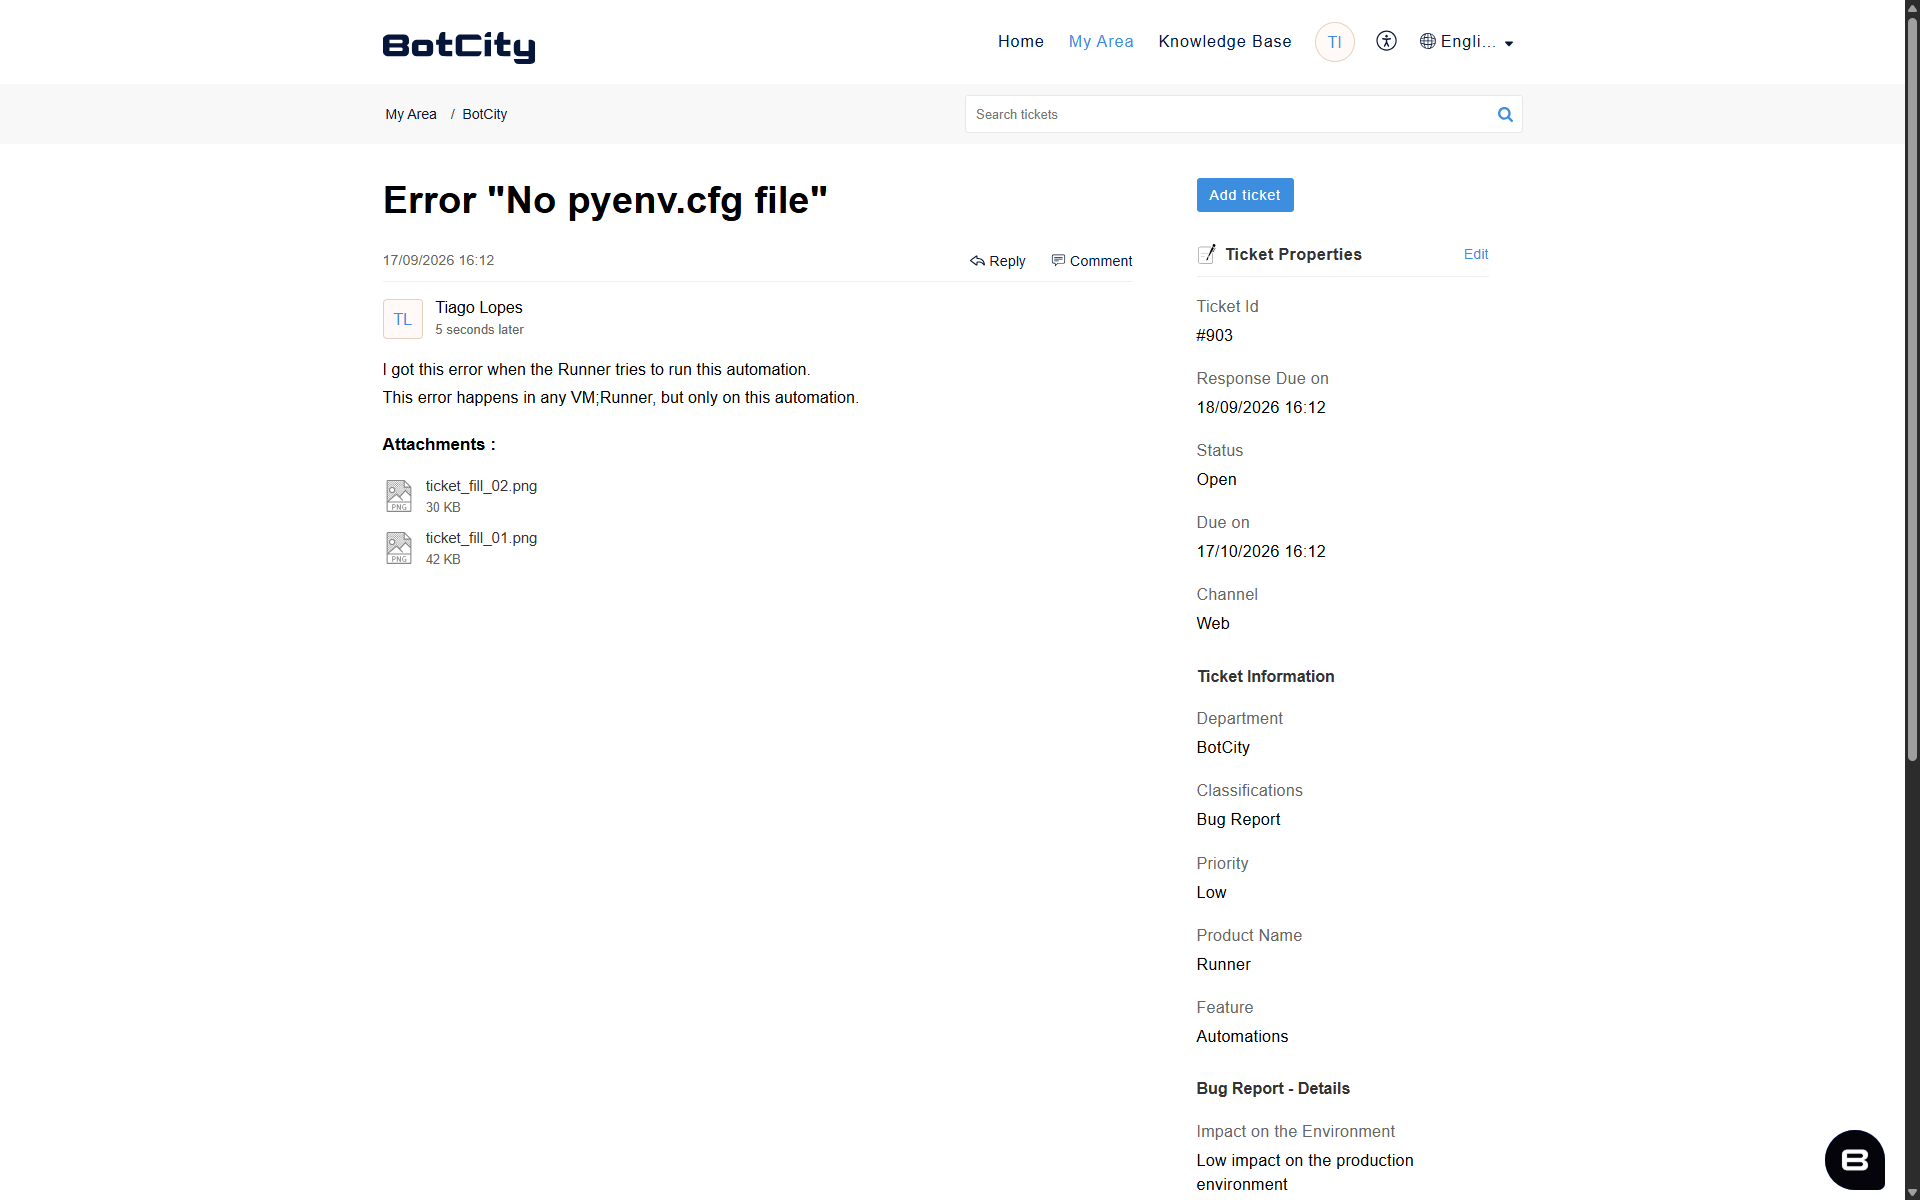
After you create the ticket, you are directed to the page where you track the progress of the service.
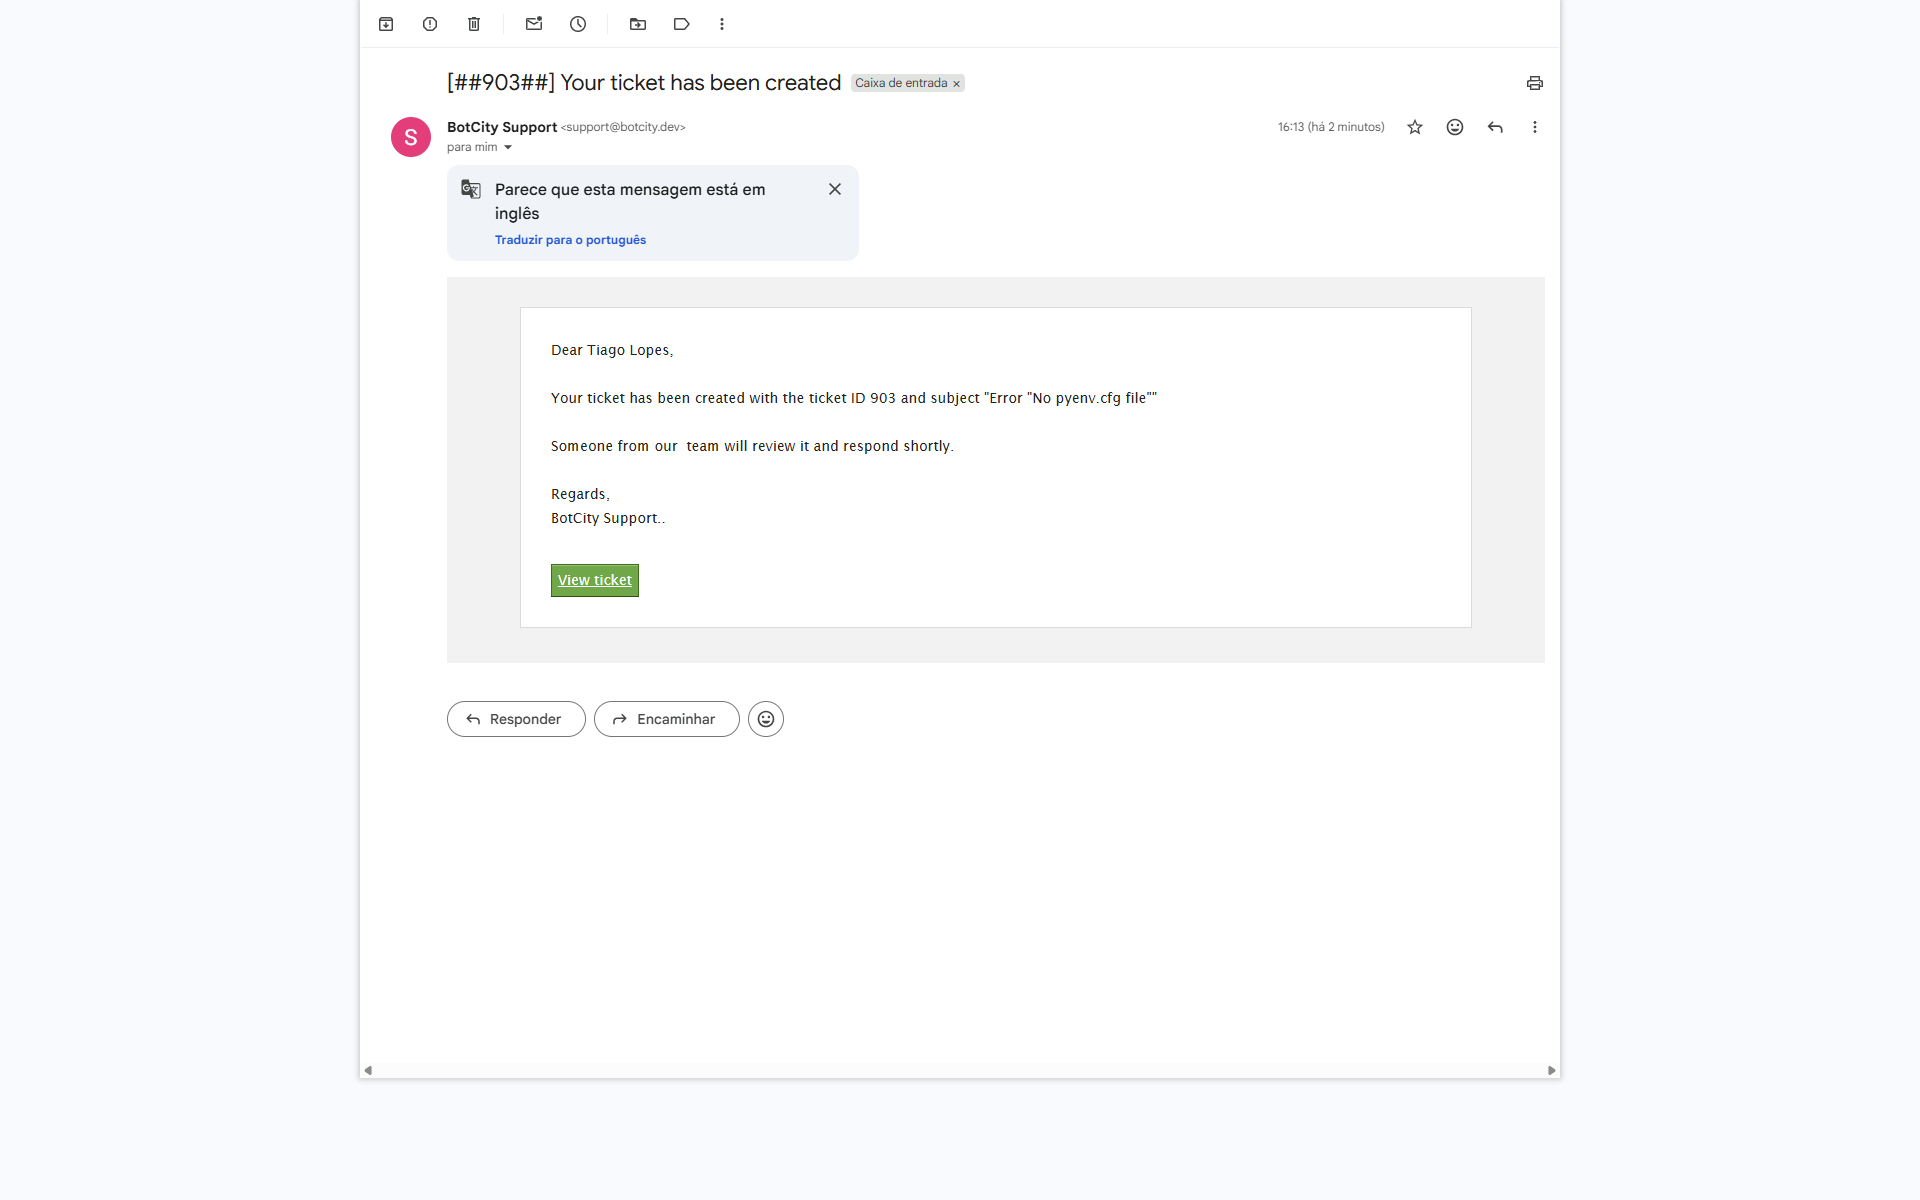
You also receive a confirmation email.
Reply to the ticket
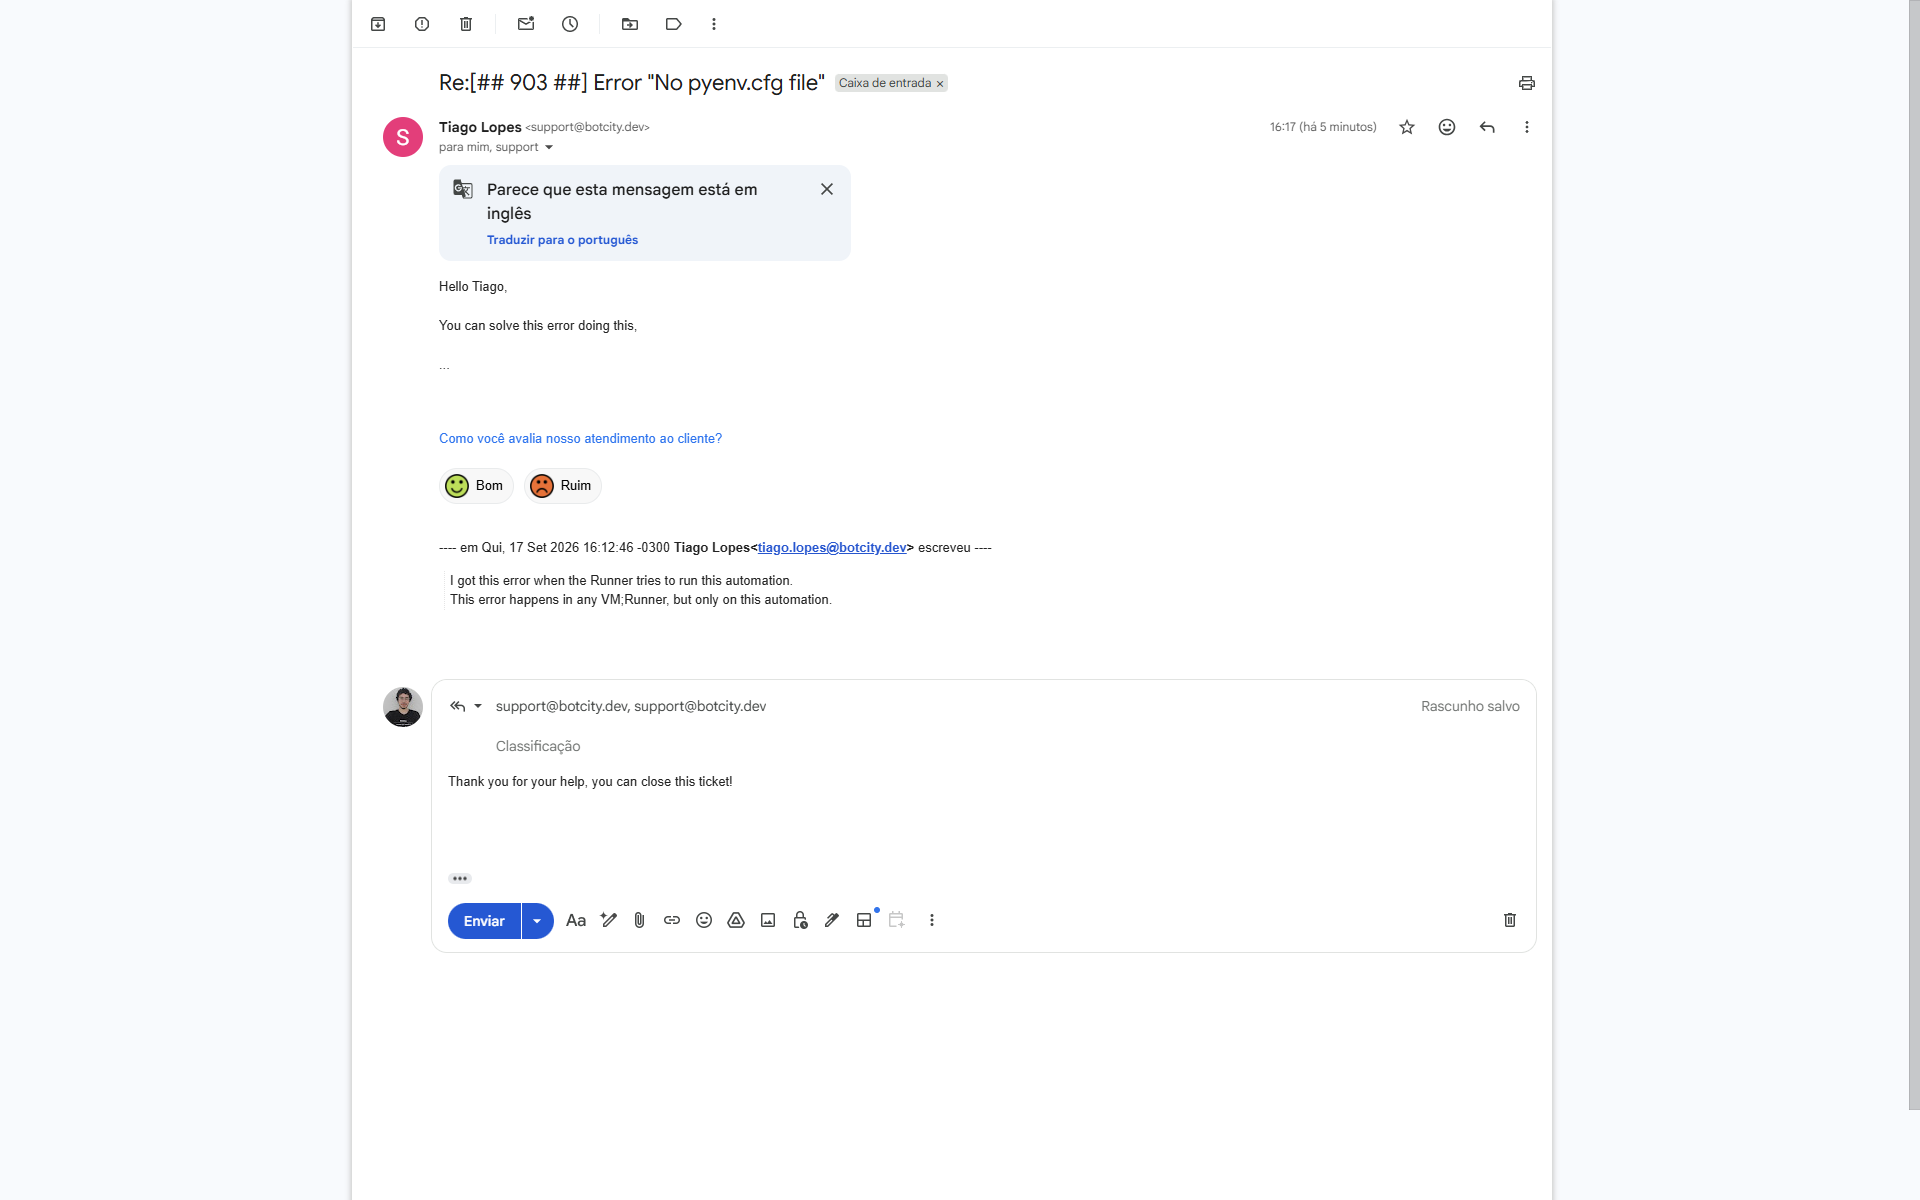
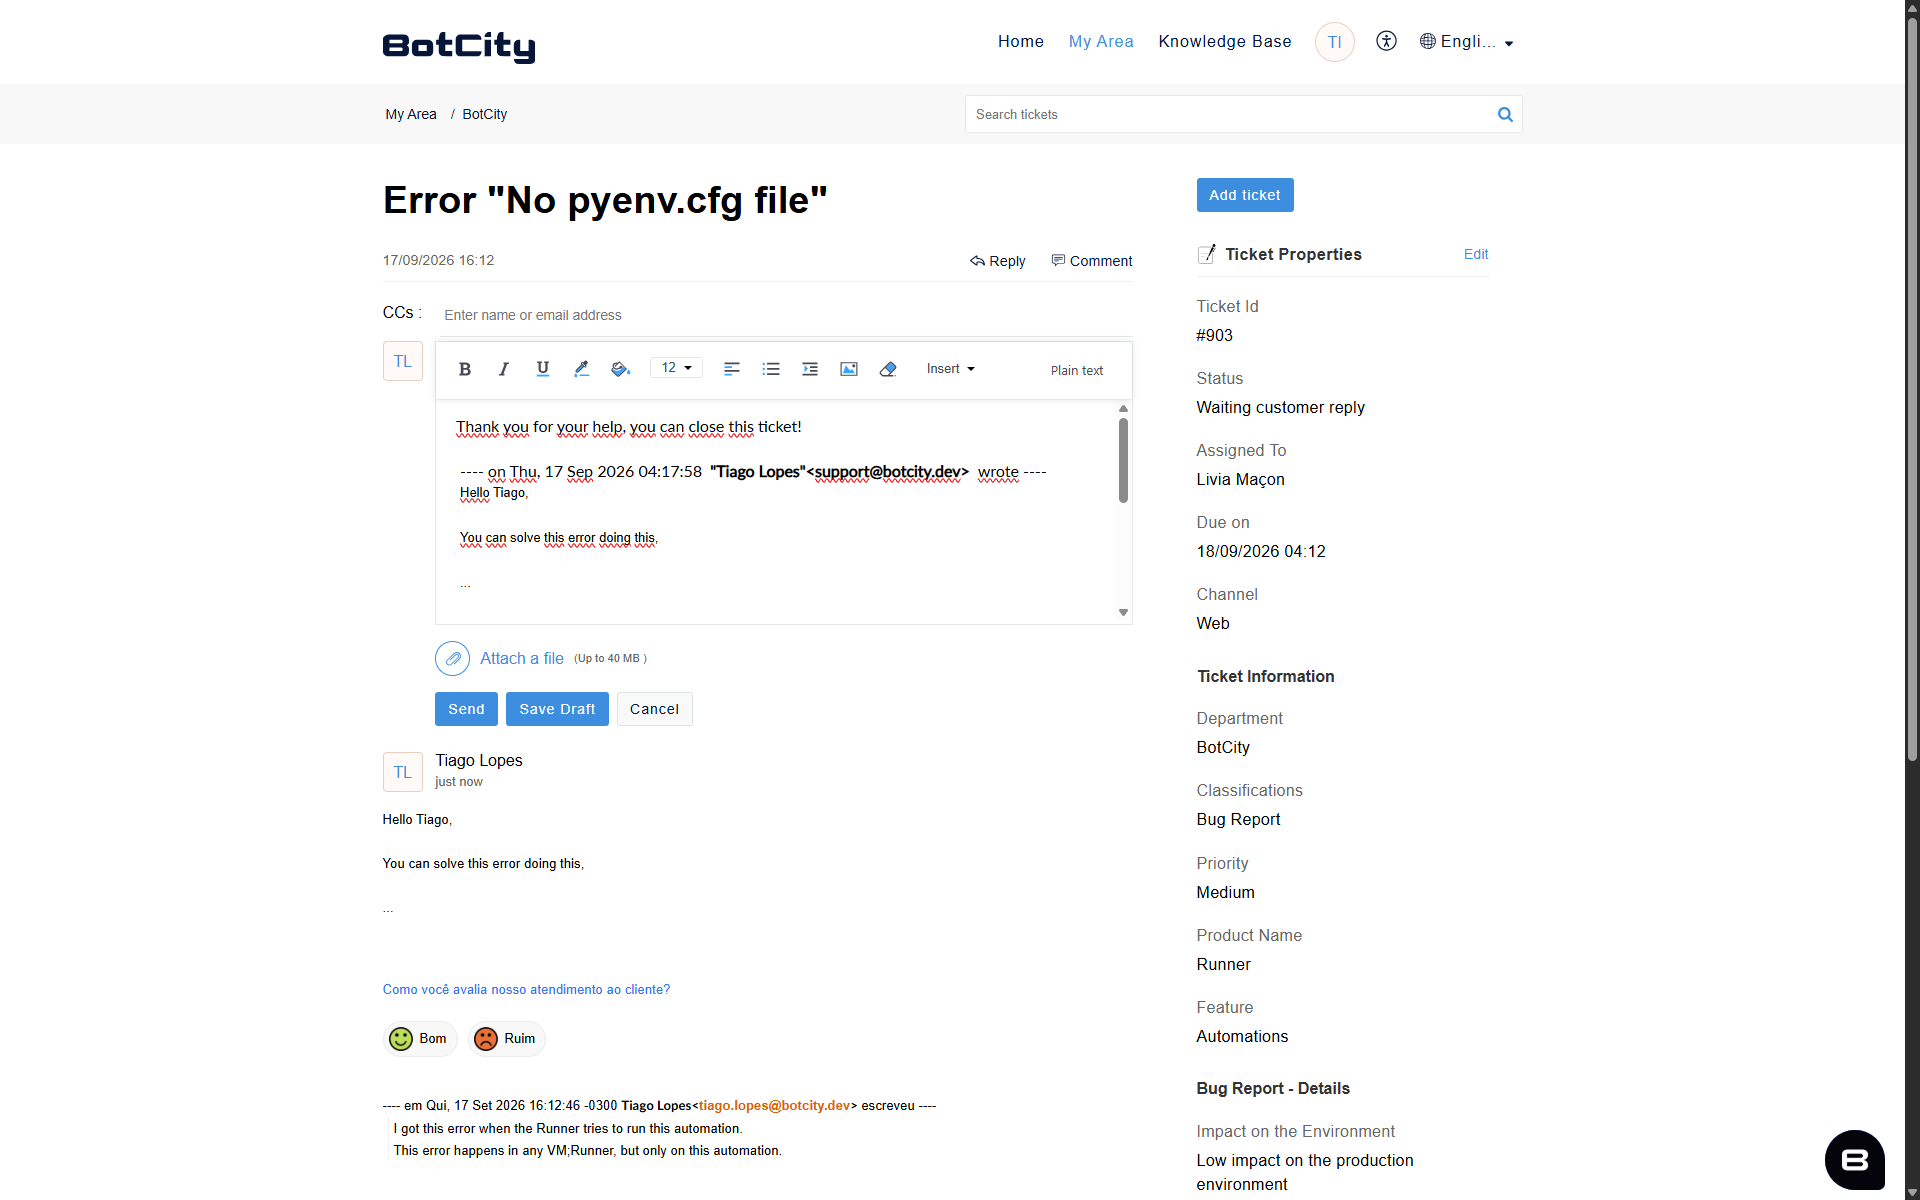
When your ticket receives a reply, you are notified by email. You can reply by email or through the portal.
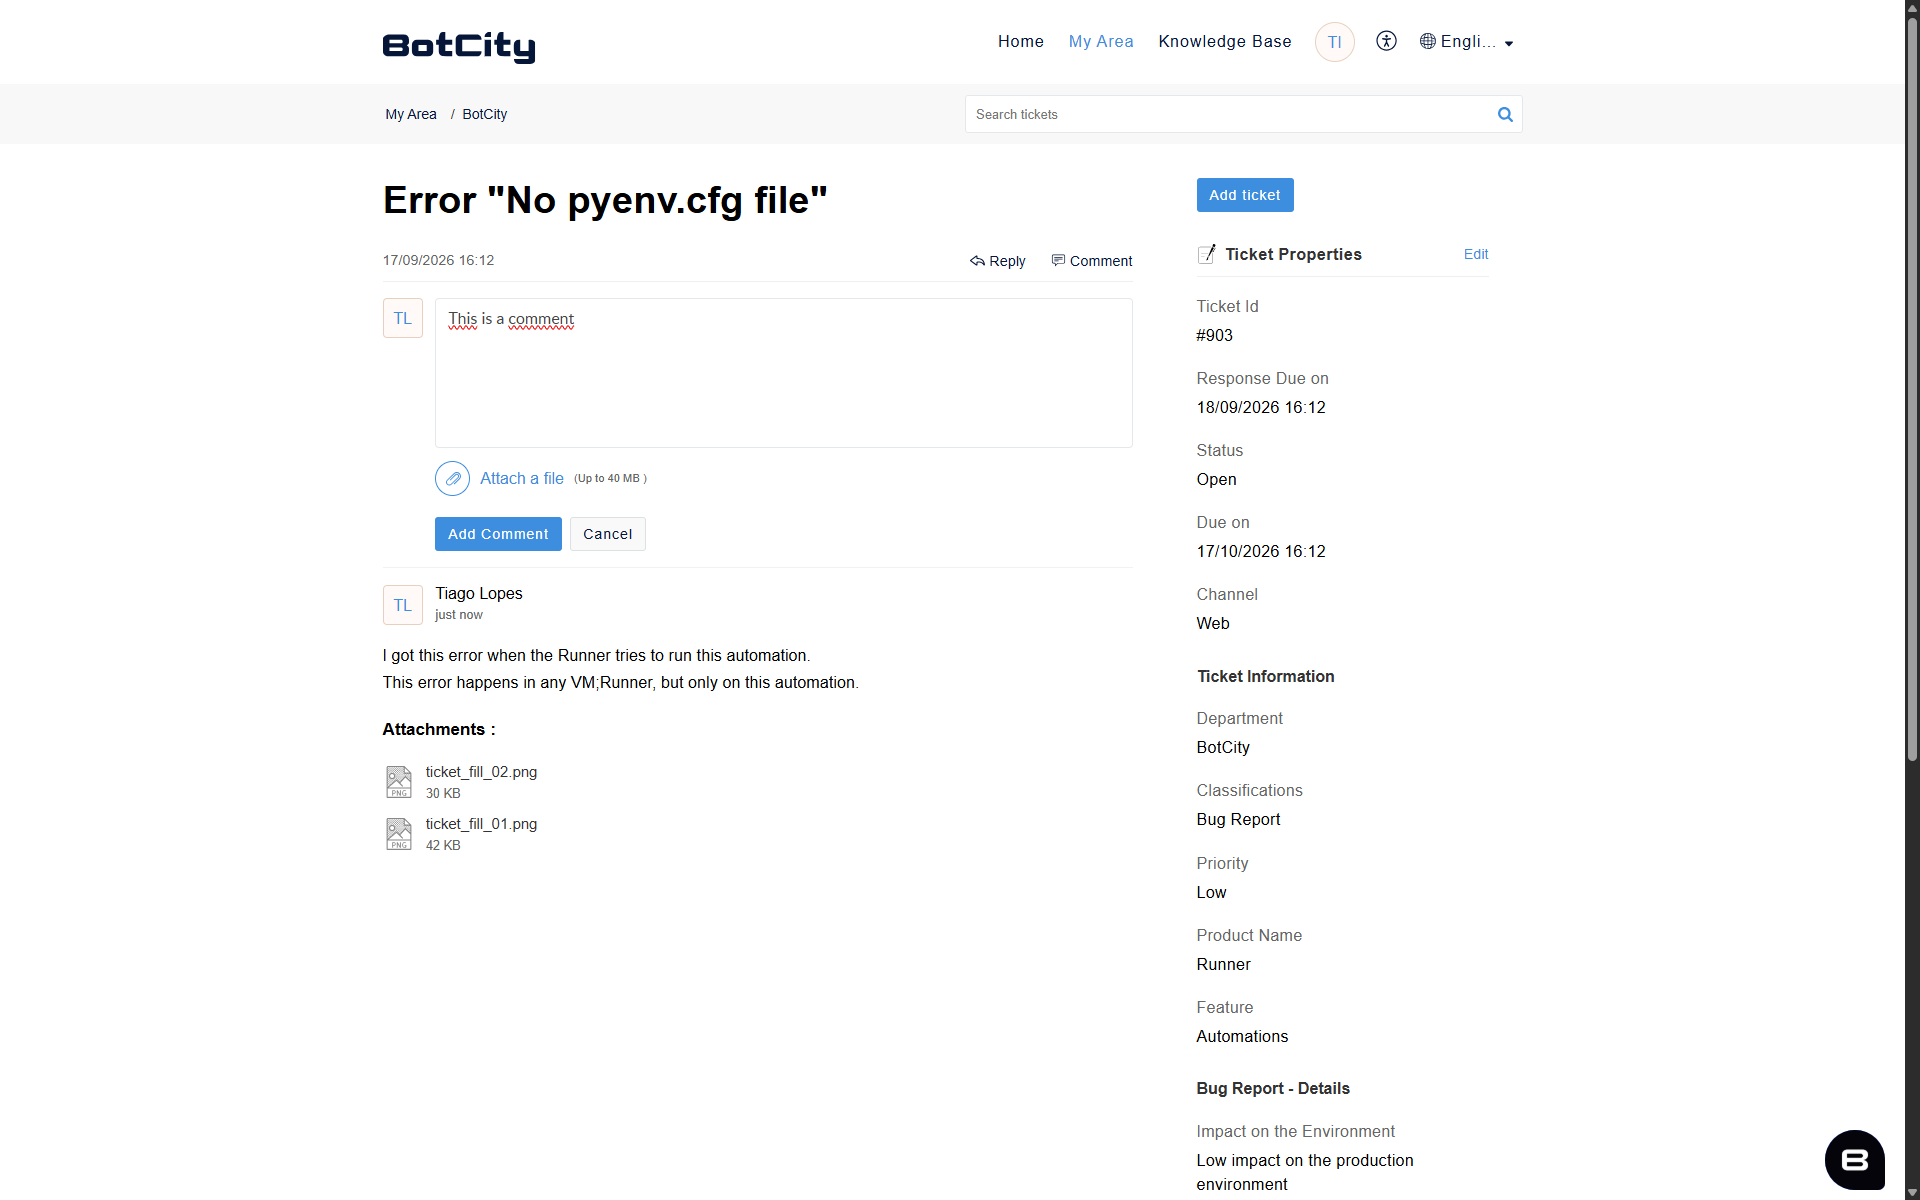
If you forgot some information, add a comment to complement the ticket.
Comments only through the portal
Comments can only be added through the portal. By email, you can only send replies.
Rate the service
Your feedback helps improve the service. If you liked the service, rate it, so we know we're on the right track. If something didn't please you, tell us, so we know where to improve.
Deadlines
The ticket response time varies according to the contracted plan. The table below shows the response times by plan and priority.
| Plan | High Priority | Medium Priority | Low Priority |
|---|---|---|---|
| Standard | High 4h/24h | Med 12h/48h | Low 48h/TBD |
| Enterprise | High 4h/24h | Med 12h/48h | Low 24h/TBD |