MCP Server
The BotCity MCP Server exposes BotCity Platform data to AI assistants compatible with the Model Context Protocol (MCP). Once connected, you query the platform in natural language, straight from your assistant, without opening the Orchestrator or writing API calls.
Through the MCP Server, you can query:
- Profile and repositories: your user data, organization, and the repositories you have access to.
- Automations: listing, status (for example, draft), and distribution by technology.
- Execution logs: schemas available per repository and records written in a given period.
- Errors: unhandled errors, details with stacktrace, and analyses per automation.
- Alerts: counts, listings, and breakdowns by type (INFO, WARN, ERROR).
- Tasks: executions per period, finish status, and trends.
- FTE and ROI: hours saved, equivalent FTE, and return on investment of your automations.
The server uses OAuth authentication: each person logs in with their own BotCity account and only accesses the data they can already see on the platform.
What you will need
- Access to the BotCity Platform with permission to use the resources you want to query.
- One of the supported clients: GitHub Copilot (VS Code), Claude Code, Claude Desktop, or Cursor.
- The server connection details, listed below.
Connection details
| Field | Value |
|---|---|
| MCP server URL | https://<your_workspace>.botcity.dev/mcp |
| Client ID | mcp |
In the configuration examples on this page, replace <URL_DO_SERVIDOR_MCP> and <CLIENT_ID> with the values from the table.
Connect to GitHub Copilot
- Open VS Code with the GitHub Copilot extension installed.
- Press Ctrl+Shift+P to open the Command Palette and type
MCP. -
Select MCP: Open User Configuration. VS Code opens your user
mcp.jsonfile.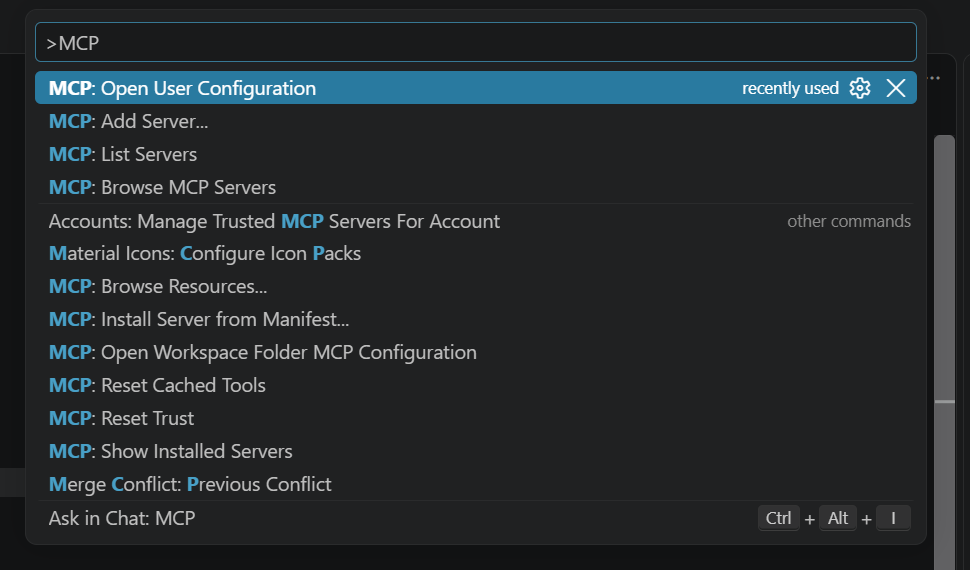
-
Add the configuration below to the file:
-
Click Start, right above the server name in the file.
- In the VS Code message asking for authentication with the server, click Allow. The browser opens the BotCity login screen.
- Log in with your BotCity account and go back to VS Code.
-
Check that the server shows the Running status.
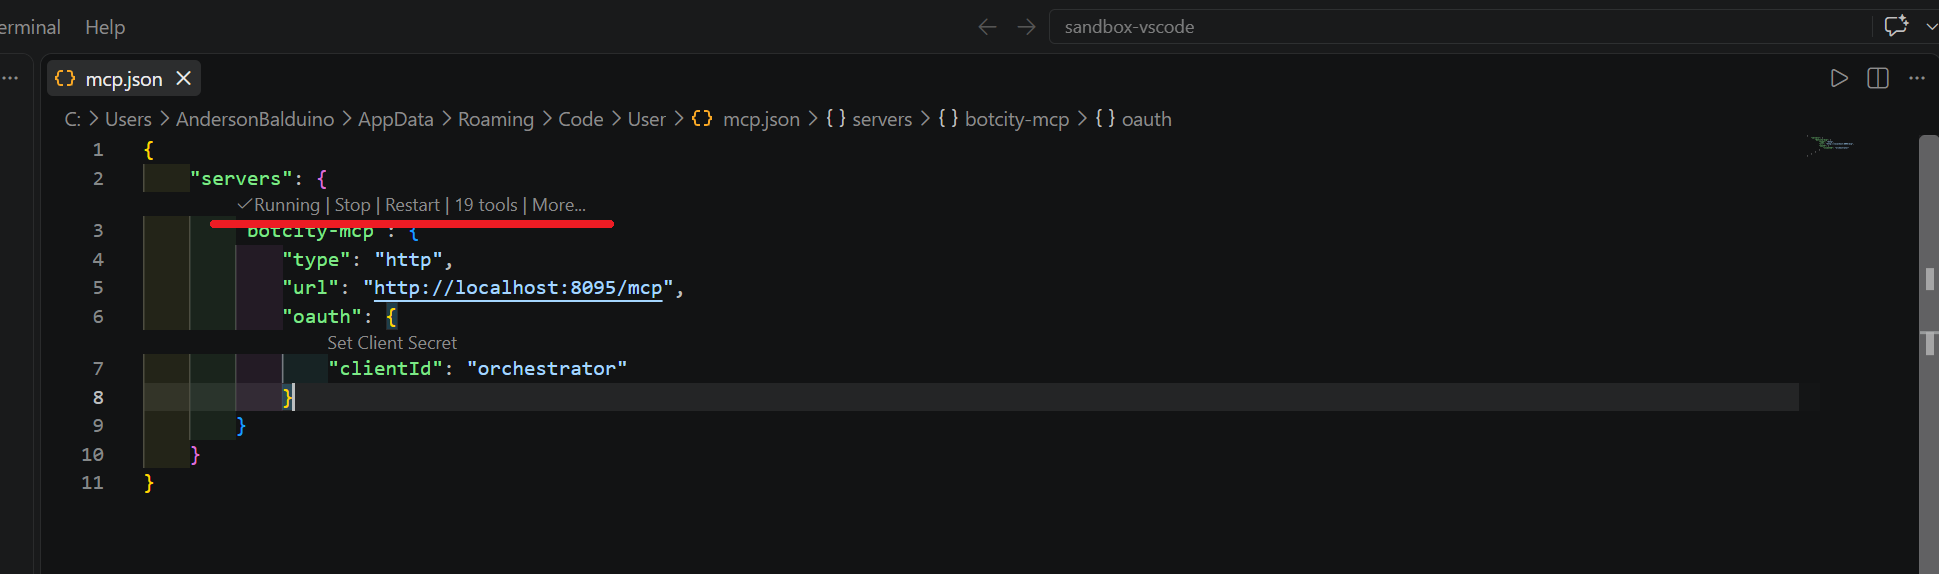
Next, test the connection in a new Copilot conversation.
Expired session in Copilot
When the login expires, Copilot shows a message and VS Code asks for a new authentication. Repeat steps 6 and 7.
Connect to Claude Code
-
In the terminal, confirm that Claude Code is installed:
-
Register the server:
By default, the server is only available in the current project. To choose another scope, add the
--scopeoption:--scope user: available in all your projects.--scope project: writes the configuration to the.mcp.jsonfile at the project root, so you can share it with your team through the repository.
If you prefer to edit
.mcp.jsonmanually, use this format: -
Check that the server was registered:
-
If the status is Needs authentication, start a session with
claudeand run the/mcpcommand. Selectbotcity-mcpand choose Authenticate. The browser opens the BotCity login screen.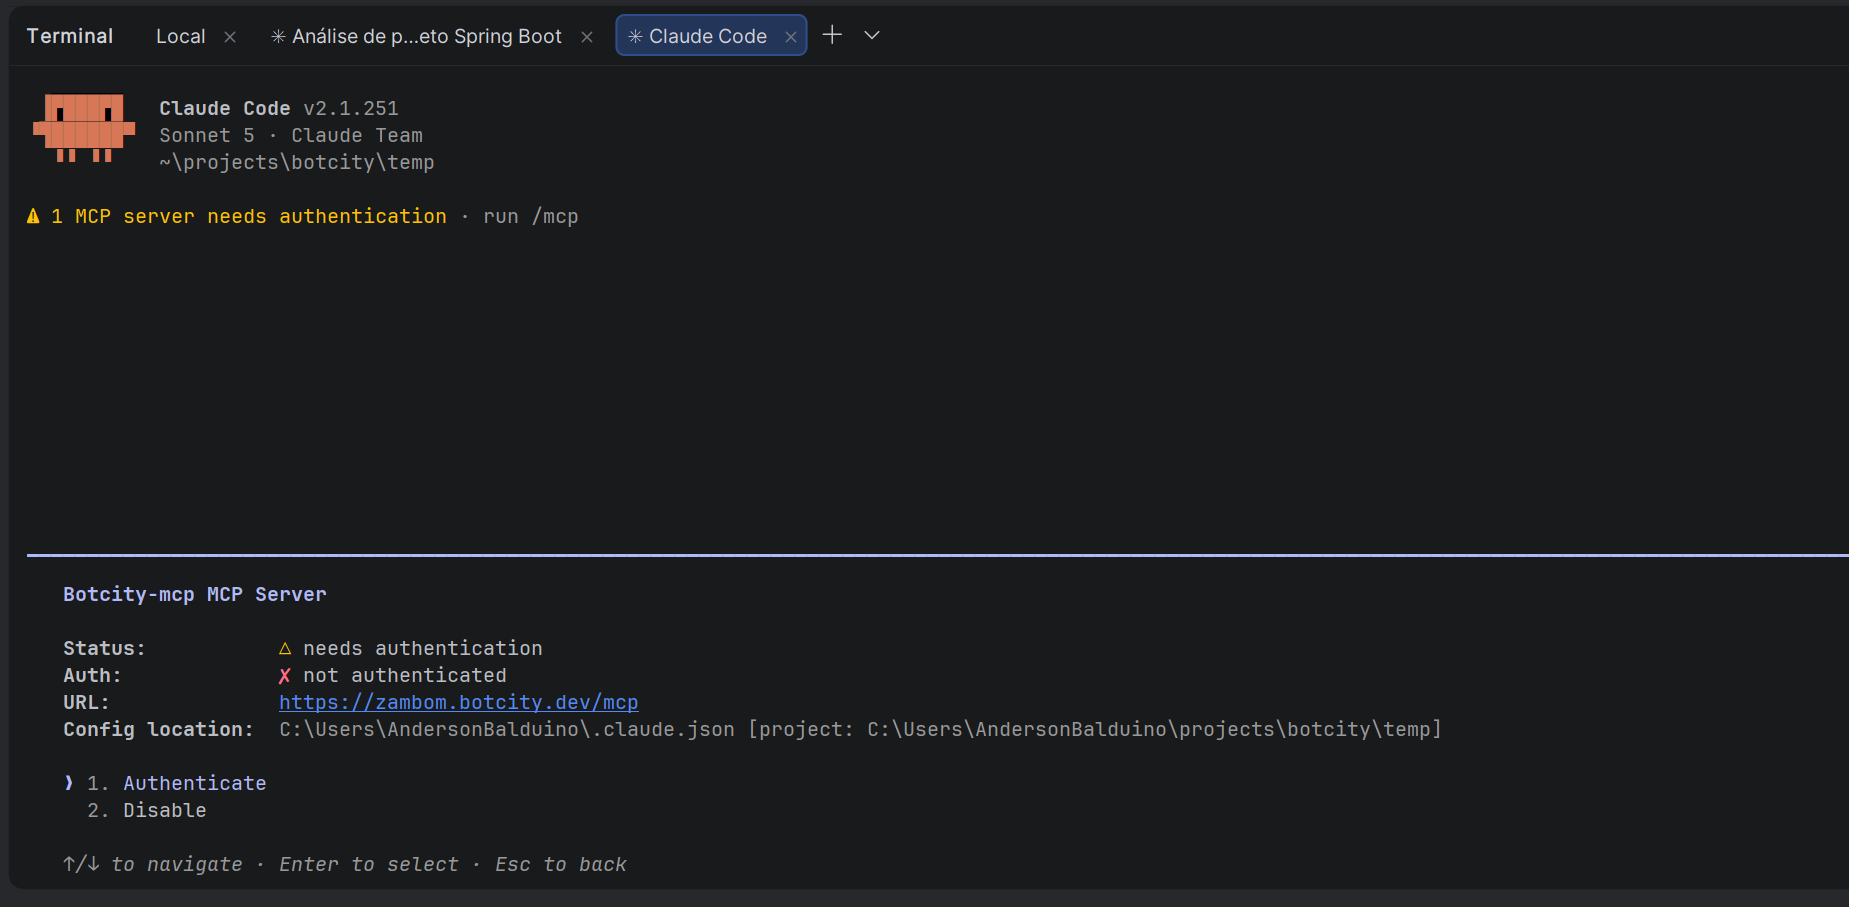
-
Log in with your BotCity account and go back to the terminal.
-
Confirm that the status changed to Connected, through
/mcporclaude mcp list.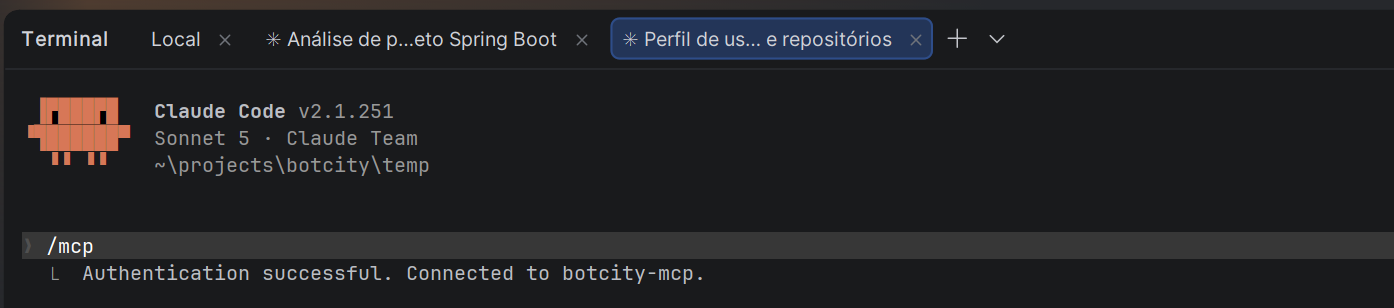
Next, test the connection in a new Claude Code session.
Token renewal in Claude Code
Claude Code tries to renew the token automatically before it expires. If the session expires anyway, run /mcp, select botcity-mcp, and choose Authenticate to log in again.
Authentication failure without Dynamic Client Registration
In some Claude Code versions, authentication can fail even with the Client ID configured, when the identity provider doesn't expose Dynamic Client Registration (DCR). If this happens, update Claude Code to the latest version before opening a support ticket.
Connect to Claude Desktop
On Team and Enterprise accounts, the Claude workspace administrator registers the connector once for the whole organization. Each person only needs to find the connector and log in with their own account.
Link an already registered connector
- Open Claude Desktop and confirm that you are logged in with your company's workspace account.
-
Click + in the message field (or type
/), hover over Connectors, and select Manage connectors. You can also reach this screen through Settings > Connectors.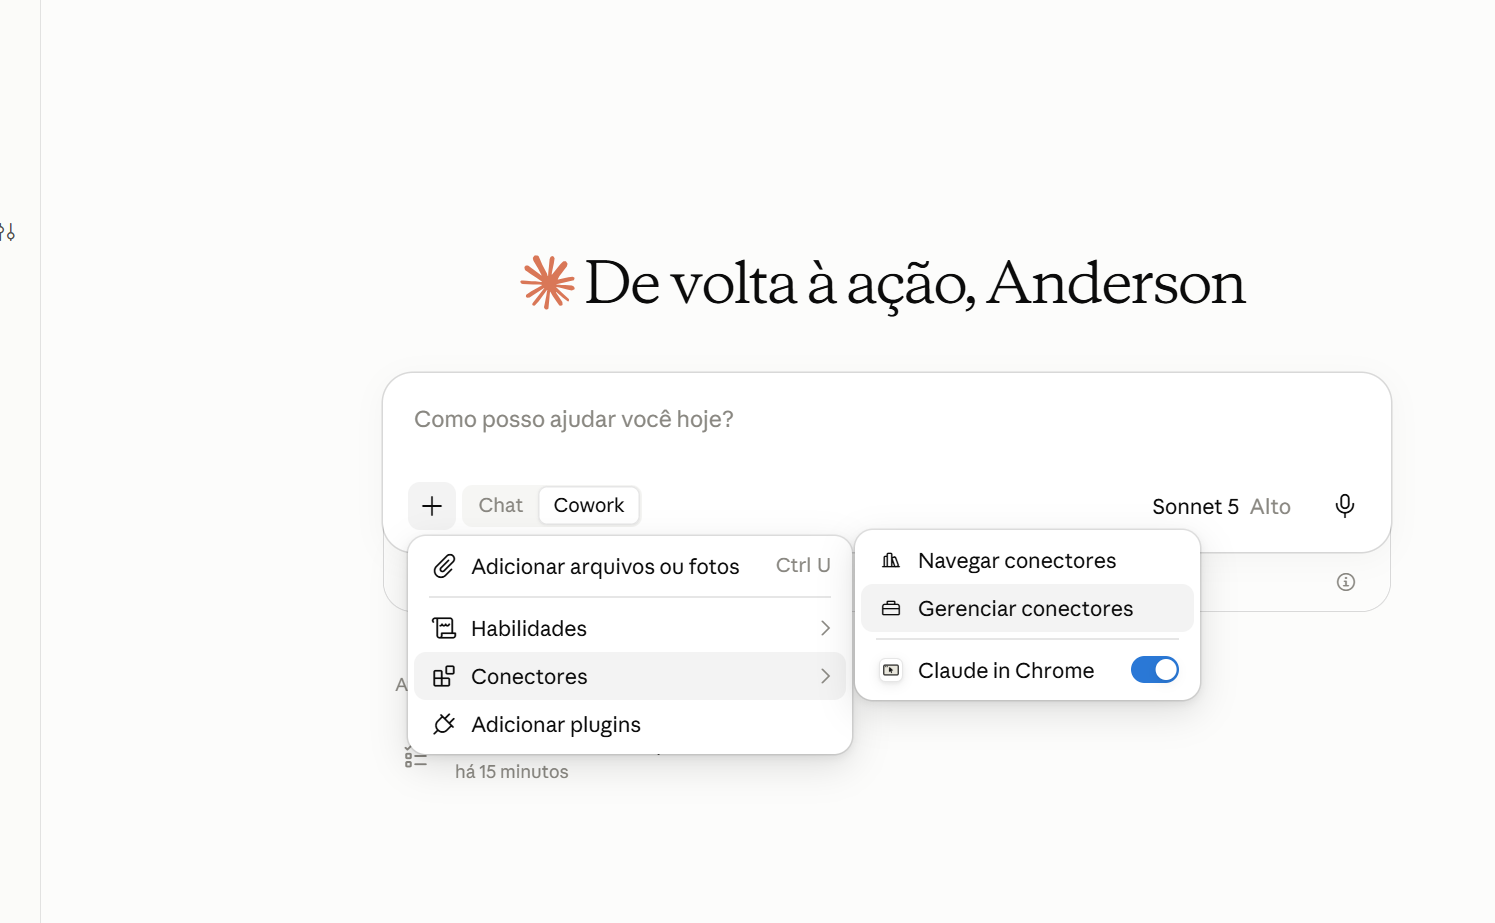
-
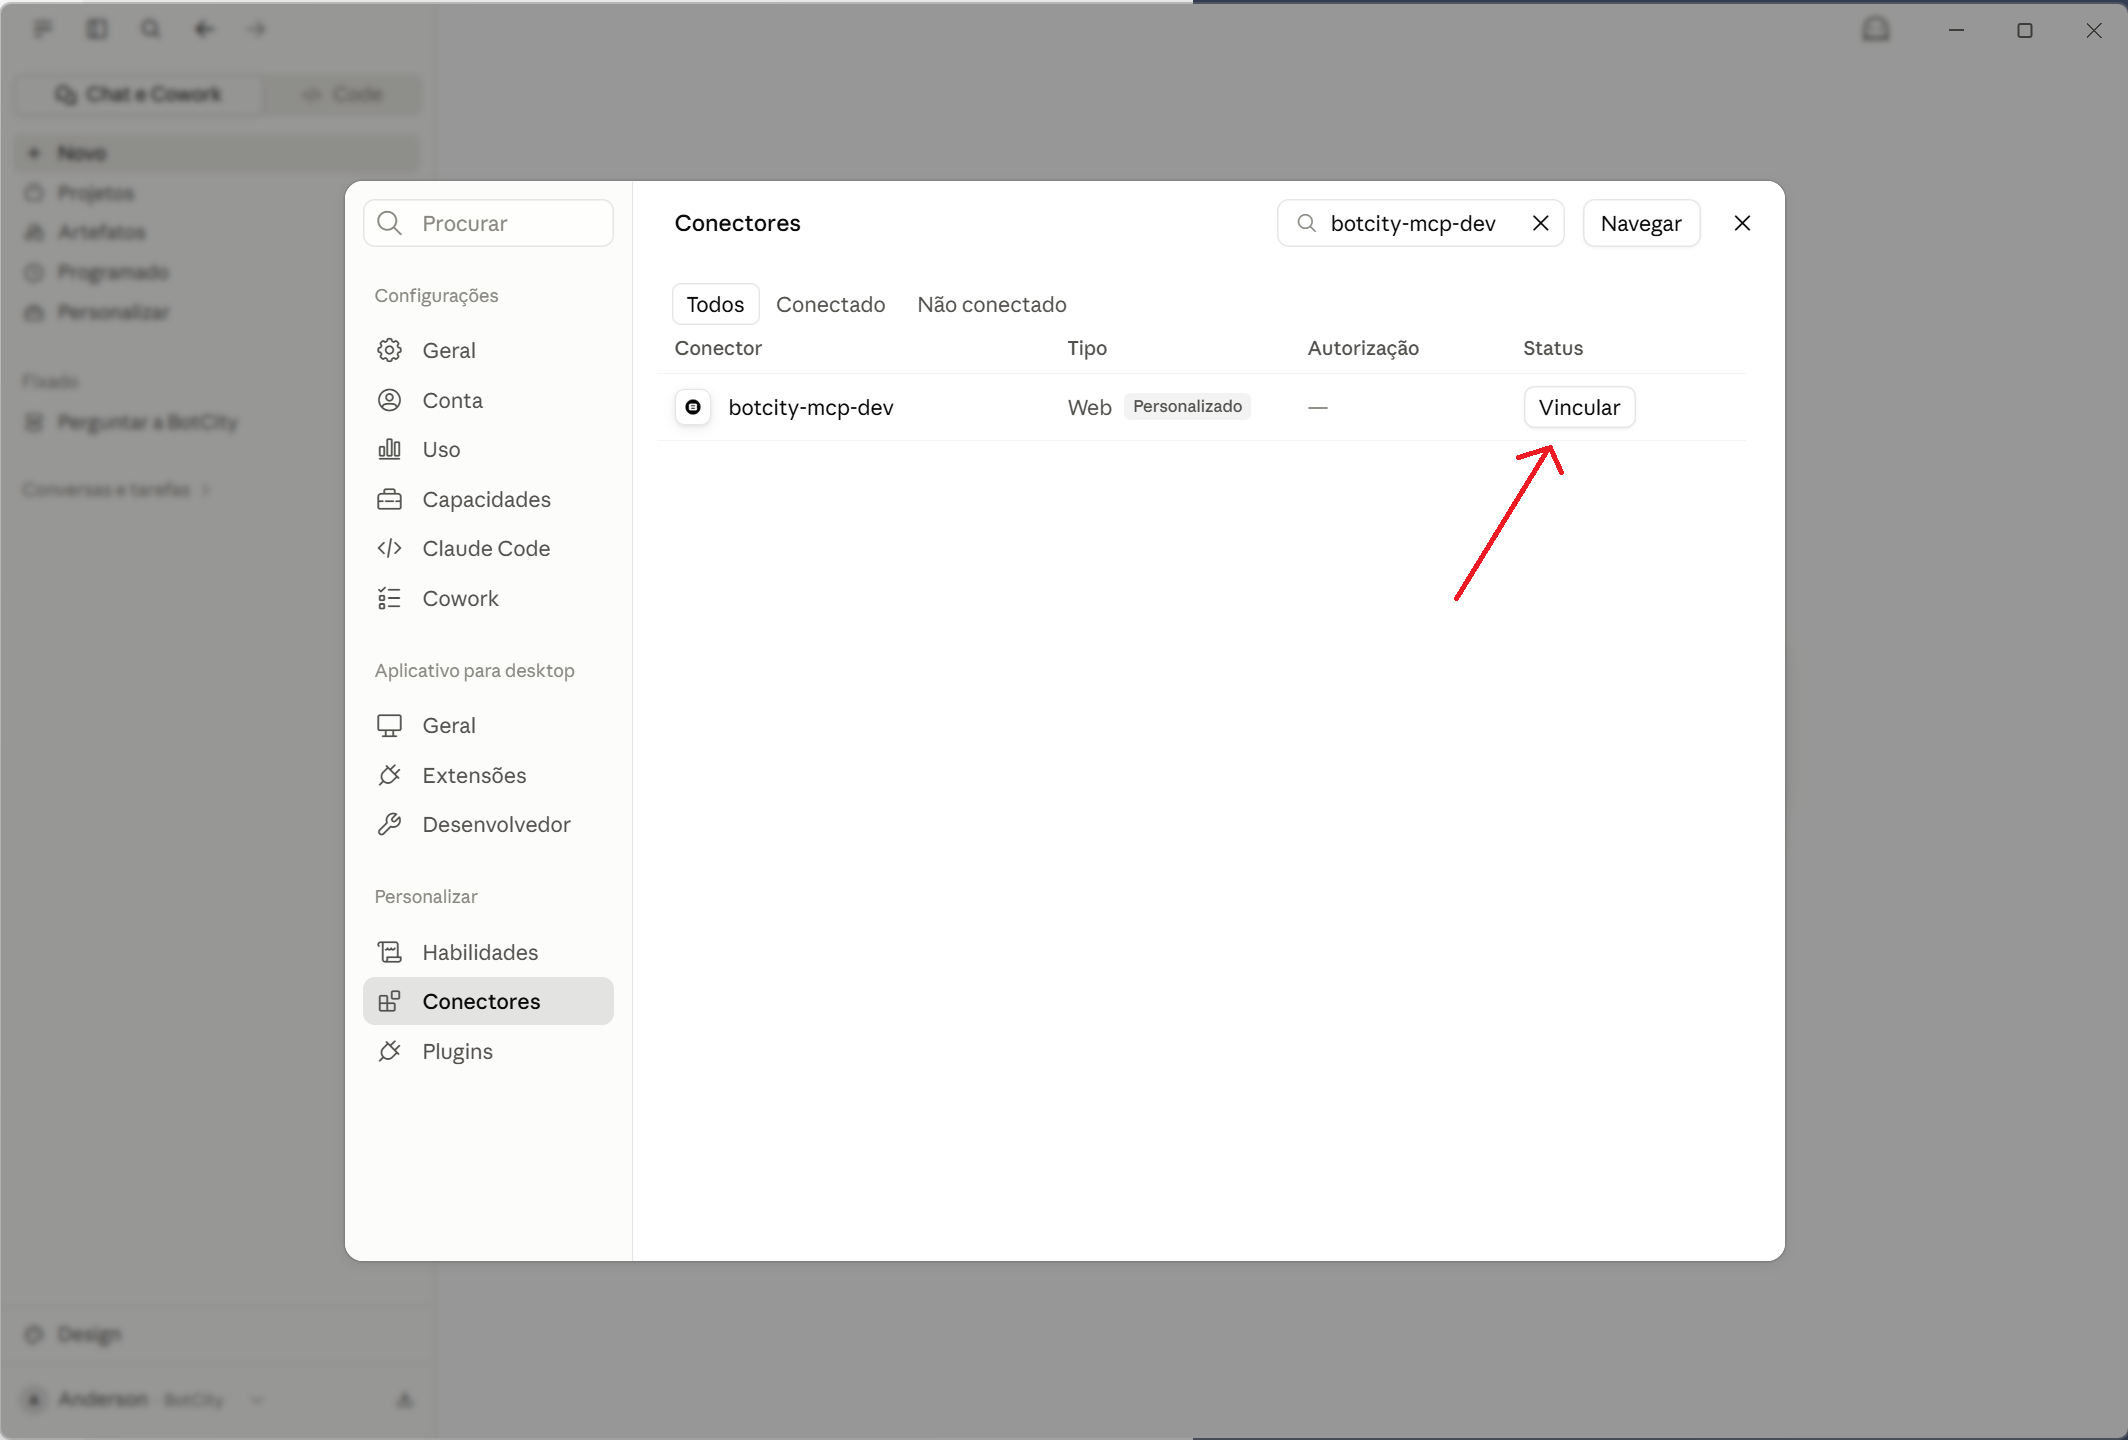
Find the BotCity connector in the list. Use the search or the All, Connected, and Not connected filters.
-
Click Connect, next to the connector. The browser opens the BotCity login screen.
-
Log in with your BotCity account and go back to Claude Desktop.
-
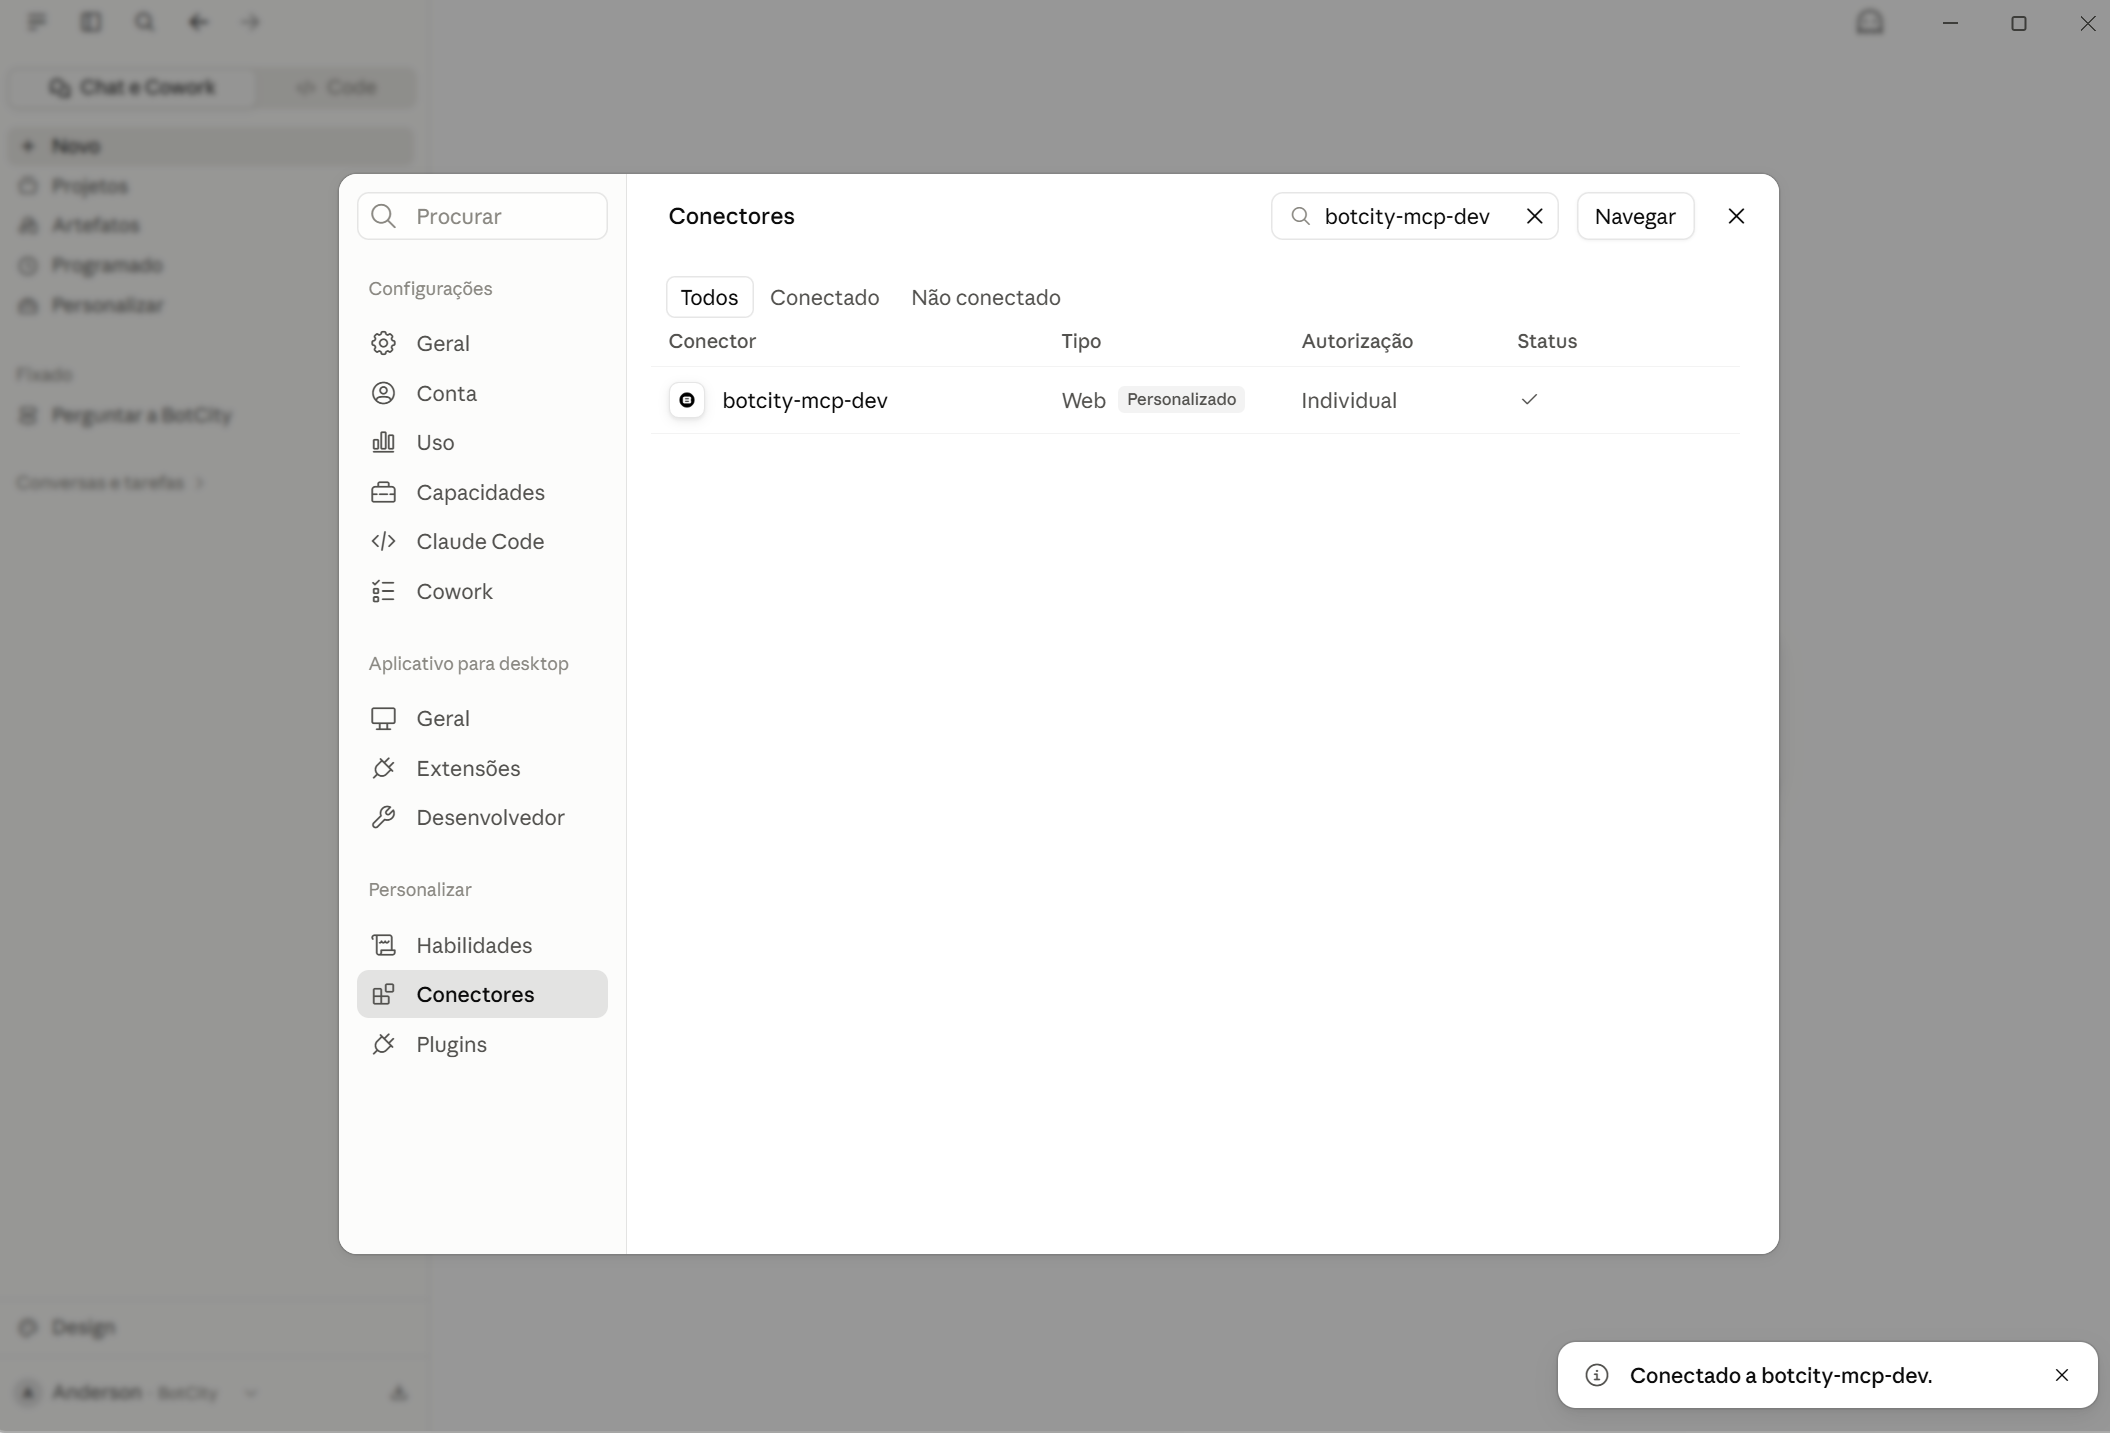
Confirm that the Status column shows the connected icon and that the Authorization column shows Individual: the connector belongs to the workspace, but the login is yours.
-
In a new conversation, click +, hover over Connectors, and turn on the BotCity connector.
Next, test the connection in that conversation.
Is the connector missing from the list?
If the connector doesn't appear, it hasn't been registered in the workspace yet. Ask your company's Claude account administrator to register it, following Register the connector manually. On Team and Enterprise accounts, regular users can usually only link connectors that are already registered.
Expired session in Claude Desktop
When the token expires, the next tool call fails or the connector shows Connect again. Repeat steps 4 and 5.
Register the connector manually
Use this flow only if the connector doesn't exist yet and you have permission to create it: an individual Pro or Max account, or an administrator of a Team or Enterprise workspace.
- Open the custom connector registration:
- Individual account: on the Connectors screen, click + and choose Add custom connector.
- Team or Enterprise: go to Settings > Organization Settings > Connectors > Add > Custom > Web.
- In Name, enter a name for the connector, for example
botcity-mcp. In URL, enter<URL_DO_SERVIDOR_MCP>. - Click Advanced settings and enter
<CLIENT_ID>in OAuth Client ID. Leave Client Secret blank: the client uses a public flow (PKCE). - Click Add and continue from step 4 of Link an already registered connector.
Claude Desktop limitations
- Registration only through the interface: Claude Desktop doesn't register remote MCP servers with OAuth from the
claude_desktop_config.jsonfile. Use the Connectors screen. - Connection made through the Anthropic cloud: authentication and tool calls come from Anthropic's infrastructure, not from your machine. The MCP server must be reachable from the public internet, or have Anthropic's IPs allowed in the firewall or VPN.
- Activation per conversation: the connector must be turned on in each new conversation where you use it.
Connect to Cursor
- Open Cursor and press Ctrl+Shift+P (Windows and Linux) or Cmd+Shift+P (macOS) to open the Command Palette.
- Type
MCPand select View: Open MCP Settings. In some versions, the option appears as Cursor Settings: Tools & MCPs. -
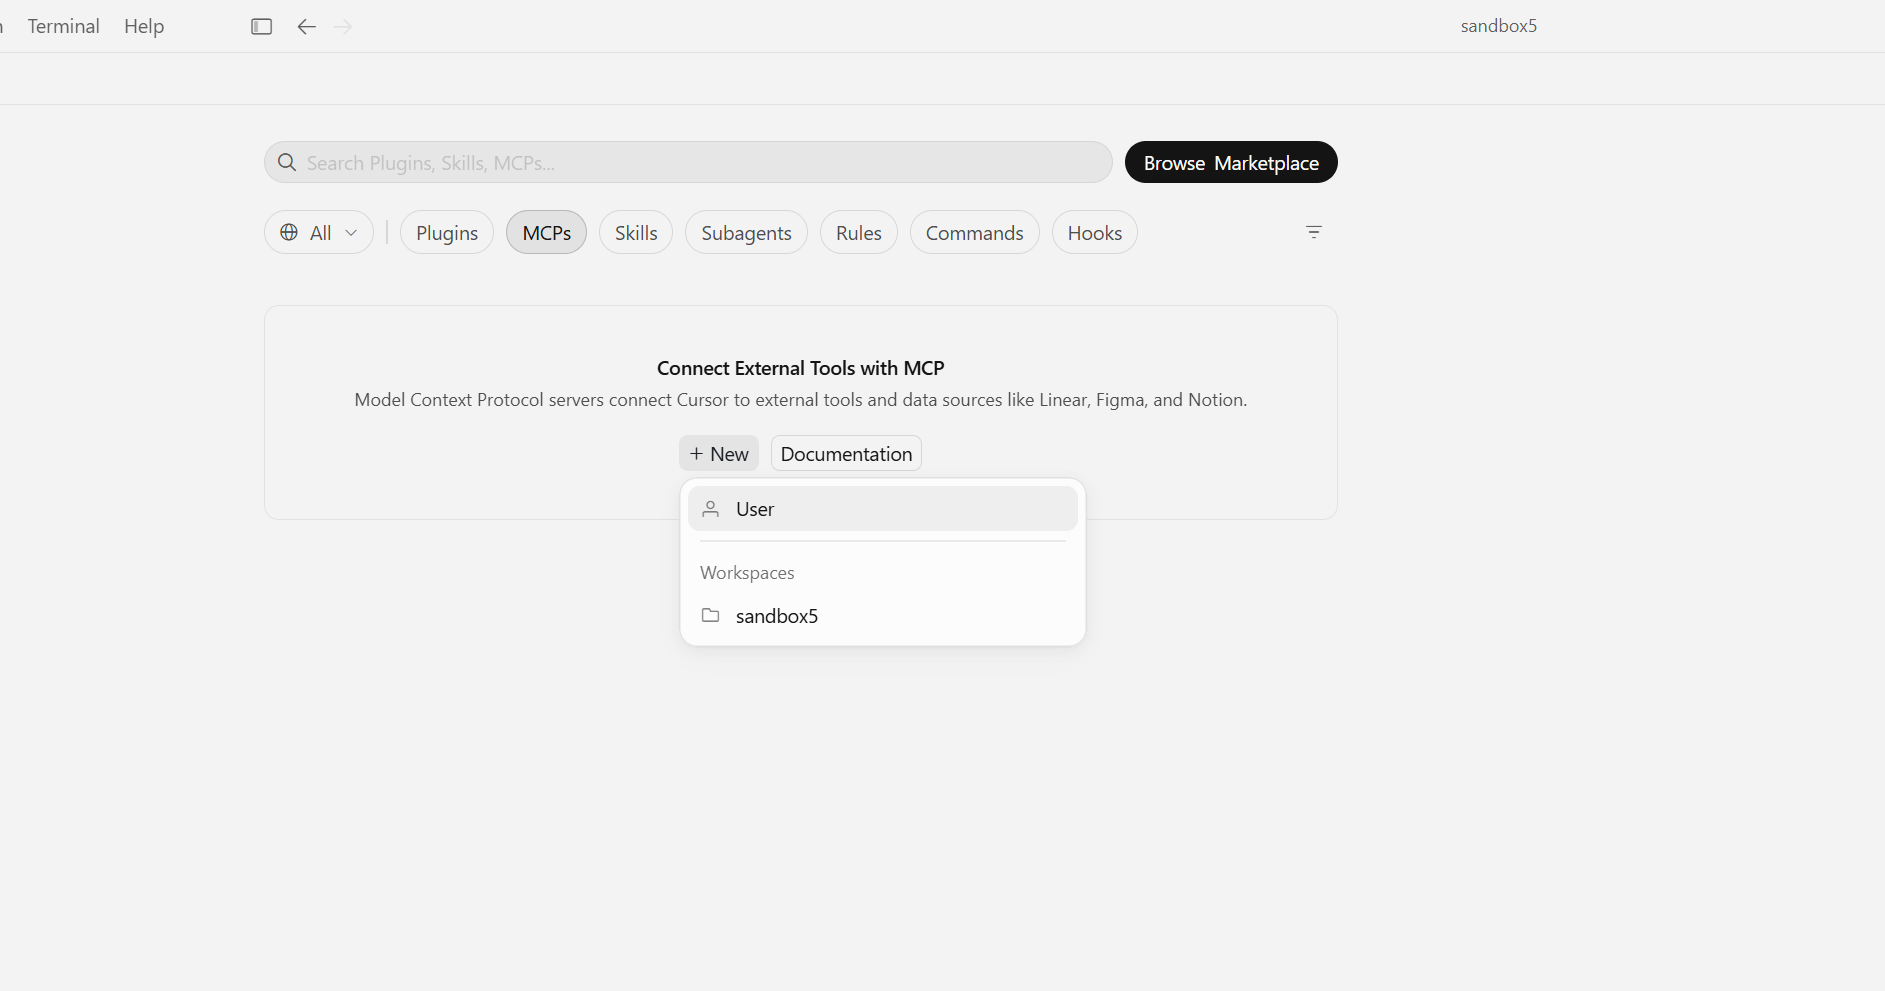
Click New (or New MCP Server) and choose where to save the configuration:
- User: writes to
~/.cursor/mcp.jsonand applies to all projects. - Workspace: writes to
.cursor/mcp.jsonin the project, so you can share it with your team through the repository.
- User: writes to
-
Add the configuration below to the
mcp.jsonfile and save it: -
In the MCPs list, the
botcity-mcpserver shows the Needs authentication status. Click Authenticate. The browser opens the BotCity login screen.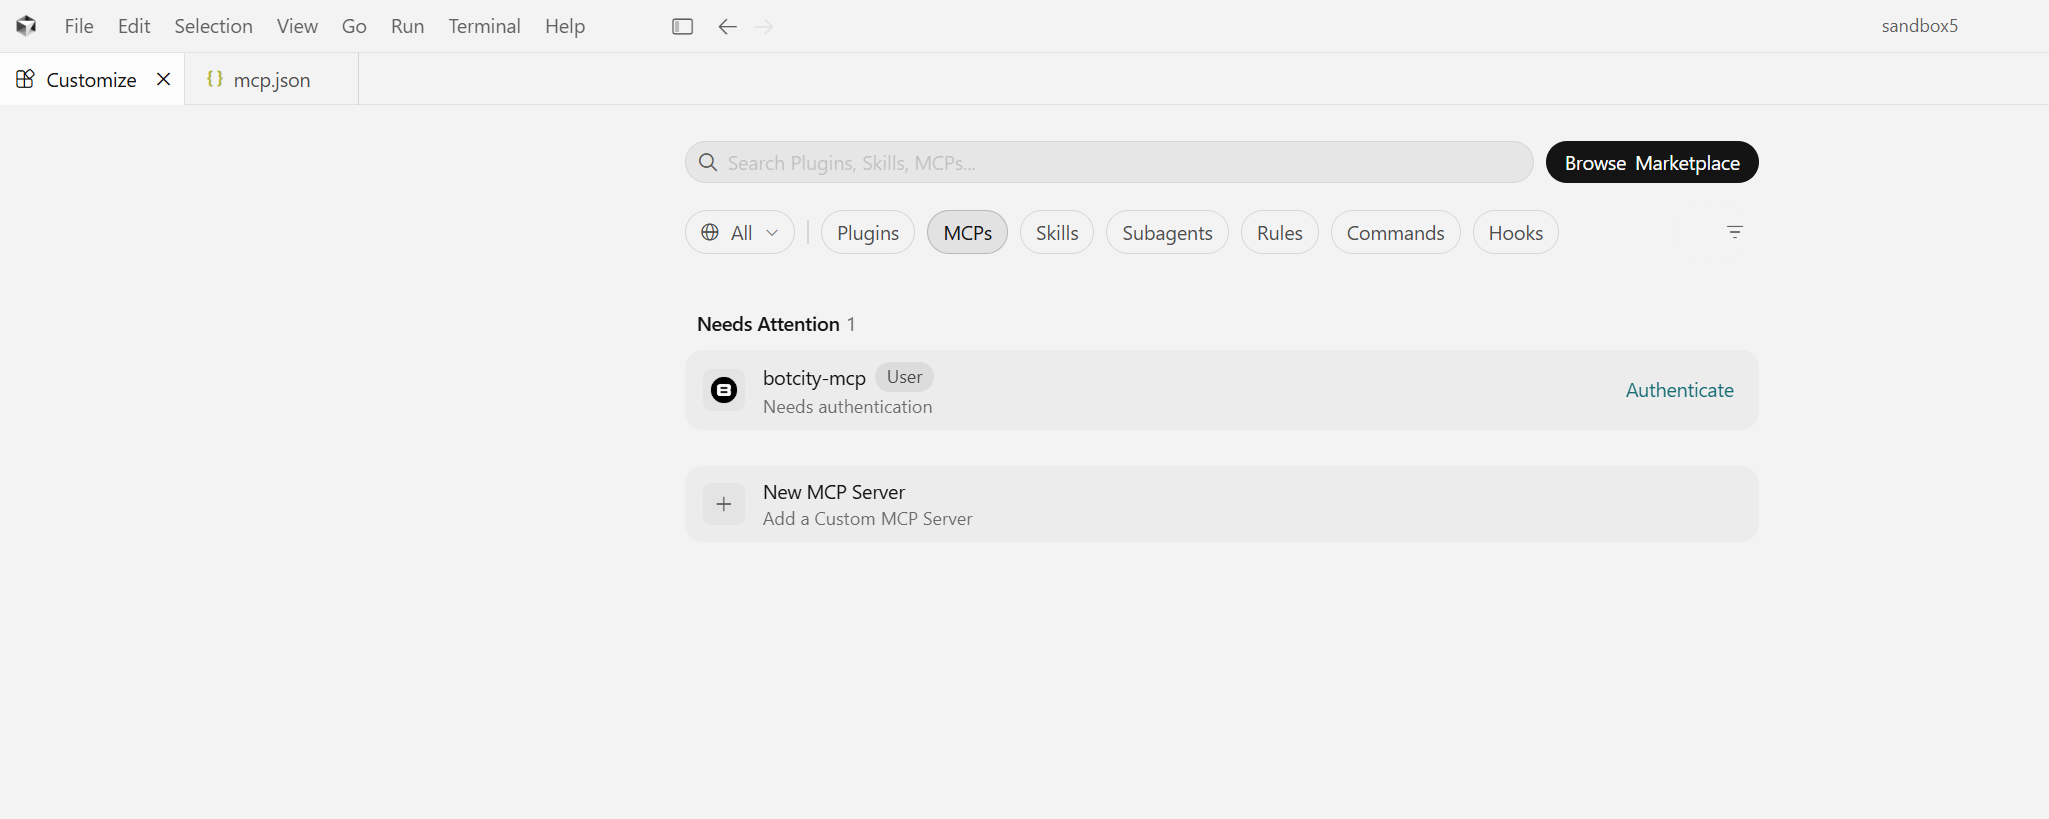
-
Log in with your BotCity account and go back to Cursor.
-
Confirm that the server shows as connected (green indicator). Click the server to see the available tools.
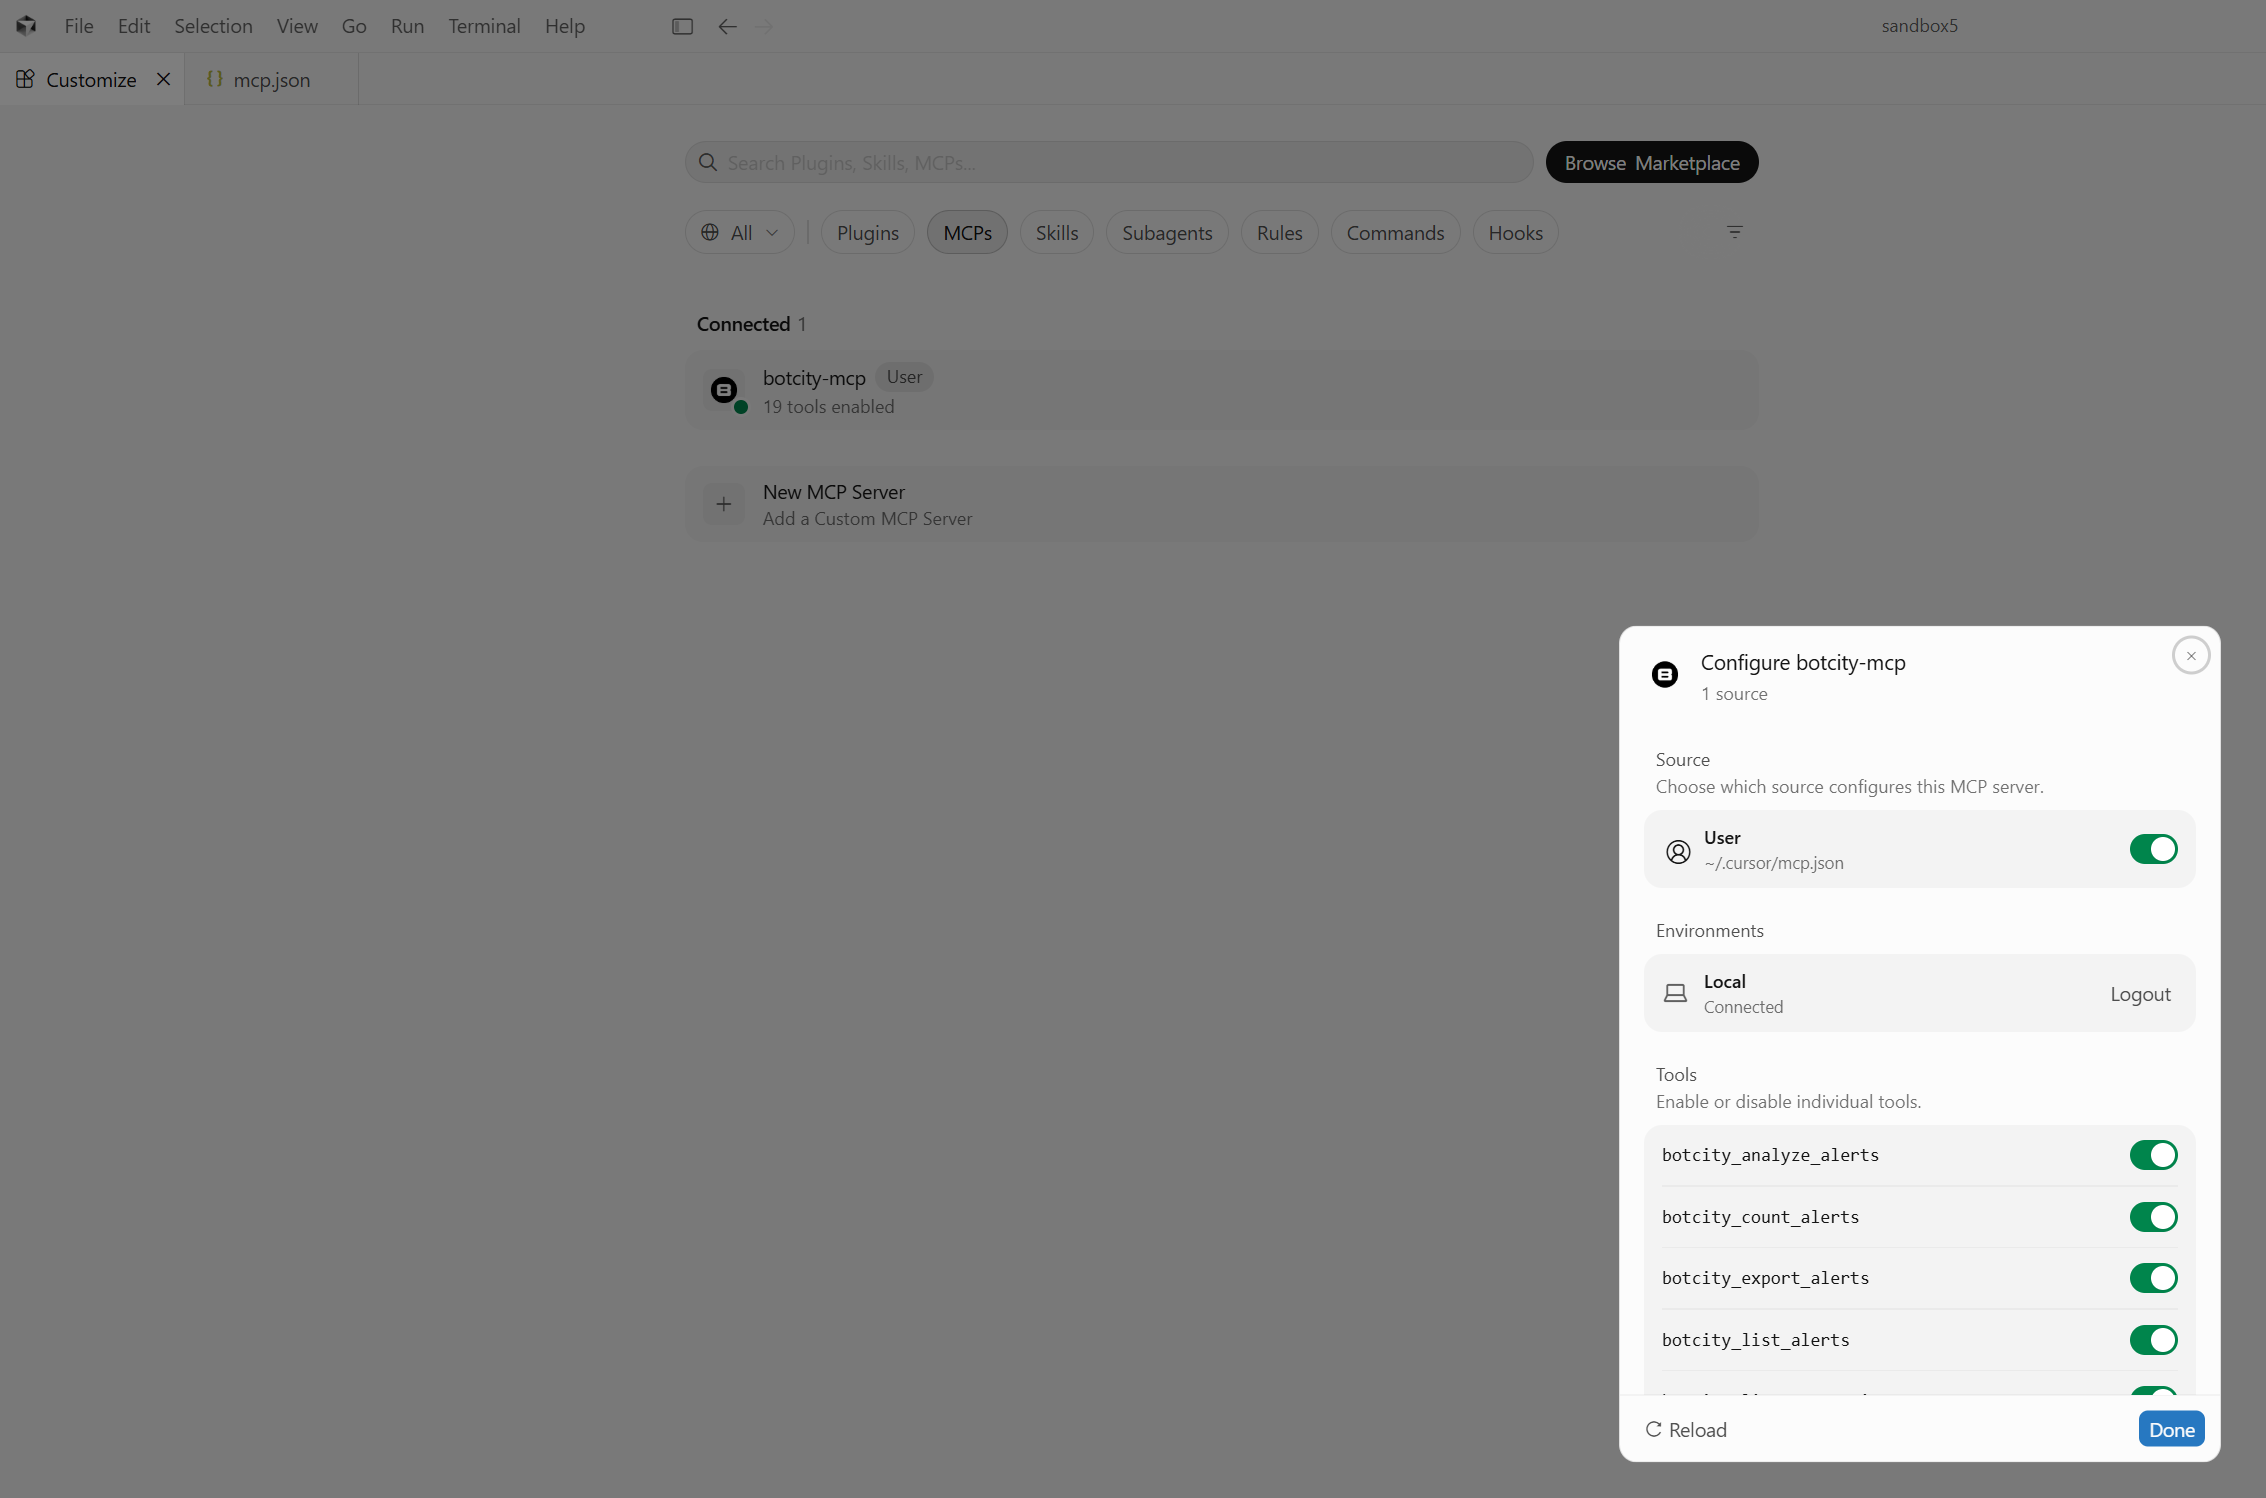
Next, test the connection in a new Agent conversation.
Expired session in Cursor
When the login expires, Cursor shows Needs authentication again. Click Authenticate and log in again.
Test the connection
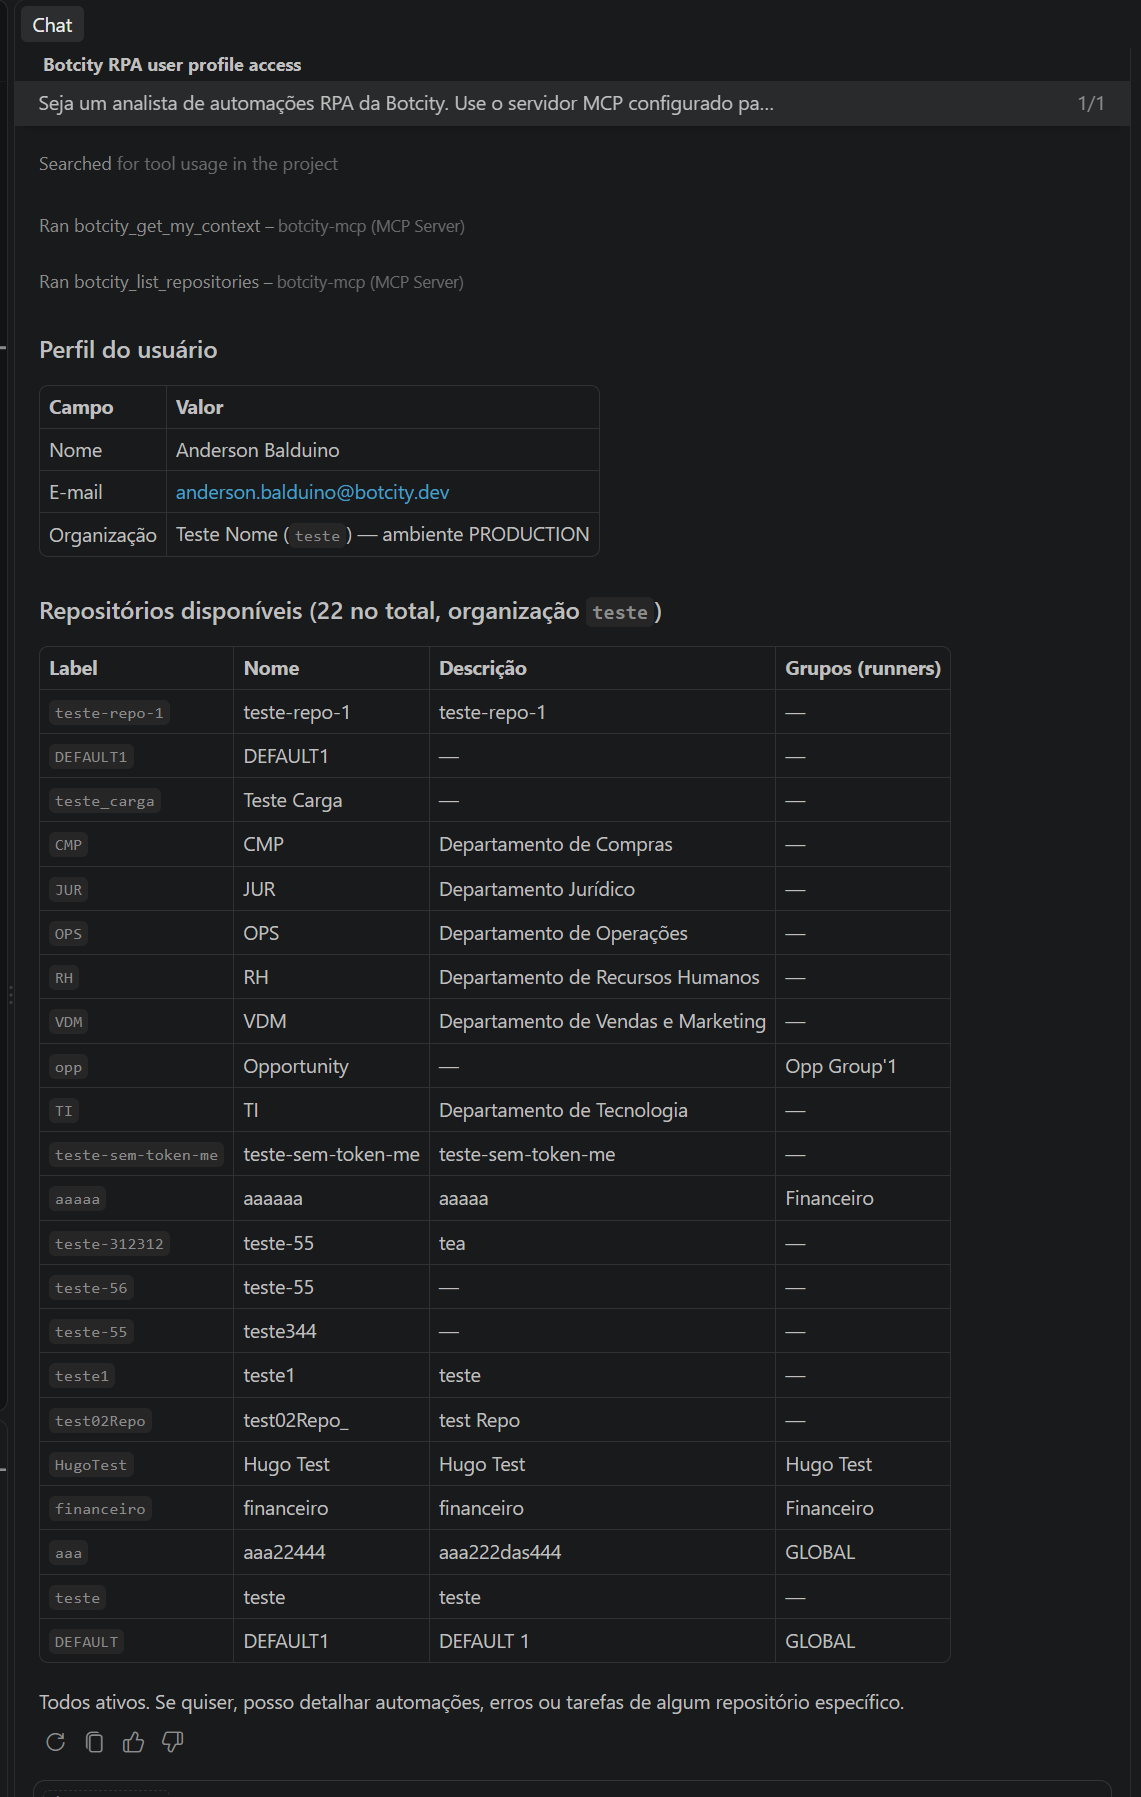
Open a new conversation in the client you configured and send the prompt below:
Act as a BotCity RPA automation analyst. Use the configured MCP server for the queries.
Could you show me my user profile and the repositories I have access to?
The assistant asks for approval before running the MCP Server tools. Approve the calls and check the answer.
Connection validated
The connection is working when:
- The client lists the MCP Server tools.
- The assistant runs a read query and returns your profile and your repositories.
- Your login happens on the BotCity screen, with no credentials stored in configuration files.
Prompt examples
After validating the connection, use the prompts below as a starting point. Replace the values in brackets with data from your organization.
- Automations: "List the automations in the [repository name] repository, sorted from newest to oldest."
- Automations by technology: "How many automations are there per technology (Java, Python, JavaScript, Command) in the organization, considering the ones created in the last 90 days?"
- Execution logs: "Which execution logs exist for the [repository name] repository? How many records did the [log name] log write in the last 7 days?"
- Errors: "How many unhandled errors occurred in the organization last month? List the details, including the stacktrace."
- Alerts: "Give me a breakdown of alerts by automation and by type (INFO, WARN, ERROR) in the last 90 days."
- Tasks: "List the tasks that failed last month and export the result as CSV."
- FTE: "What FTE have my automations generated since April? Also show the 5 automations that contributed the most."
- ROI: "What is the ROI of the automations in the [repository name] repository this year?"
Troubleshoot
| Problem | What to check |
|---|---|
401 or 403 error |
Whether the login was completed and whether your user has permission on the platform for the queried resources. Authenticate again in the client. |
| Timeout or connection failure | Whether the server URL is correct and whether your network, VPN, or firewall allows access to it. |
| Needs authentication status doesn't change | Whether the login on the BotCity screen was completed and whether the browser returned to the client. Authenticate again. |
| The tools don't appear | Whether the server is connected in the client and whether the client supports remote (HTTP) MCP servers. Restart the server or the client. |
| Authentication failure in Claude Code | Whether Claude Code is on the latest version. See Connect to Claude Code. |
| Connector doesn't appear in Claude Desktop | Whether the workspace administrator has already registered the connector. See Connect to Claude Desktop. |